Category Archives: articles

Bill Varney’s surf fishing articles. Catch halibut in the surf. Perch fishing tactics. Corbina baits and rigging, Spotfin croaker fishing and more.

Candy Bait for Corbina

Candy Bait For Corbina

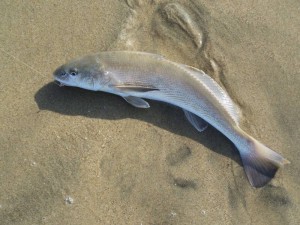
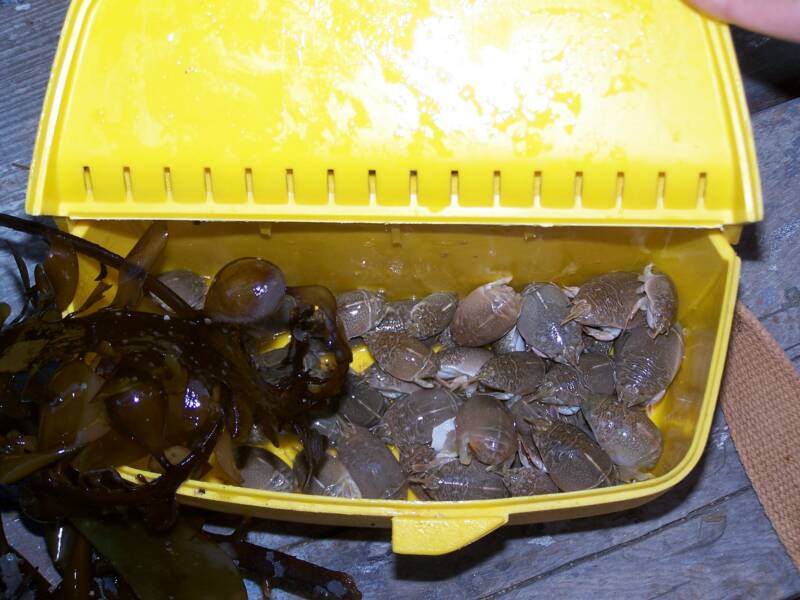
When spring rolls around corbina have been hole-up in bays, harbors and estuaries.  As the water warms they know it’s time to leave these safe confines and make their way to the beach.  As they spread out along the shore corbina search for the fine odor of fertile sand crabs and gorge themselves.  Weeks, then months go by and all they eat are crabs—wonderful crabs.  But like any good diet even the best foods get a bit dull and that’s where ghost shrimp replace prime crab rib with lobster.

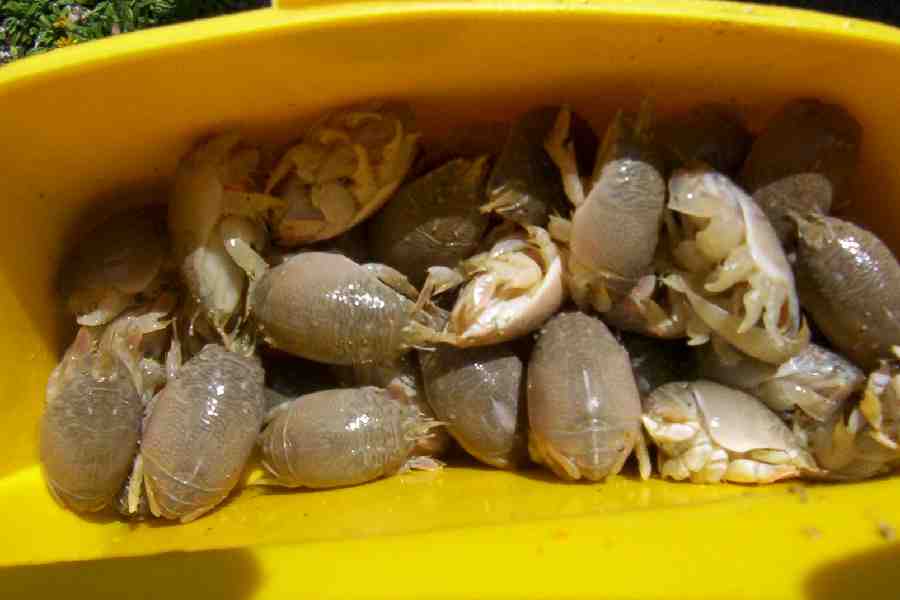
GHOST SHRIMP BAITGhost shrimp have always been known as the “candy bait” of the surf.  Available in stores for decades shrimp are now flown in from half-way across the world or caught at your local estuary.  Although very few stores now carry ghosties you can still find them with a little patience and perseverance near harbors, bays and estuaries.

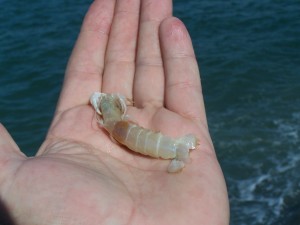
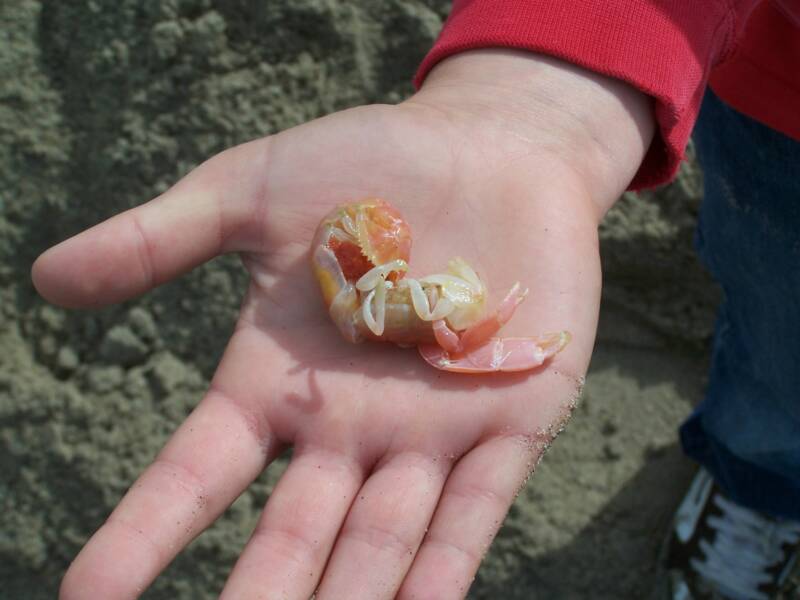
Ghost shrimp can be found in many places along the Southern California and Northern Baja coast.  Adult shrimp grow to about 4.5” and males tend to have one claw that is considerably larger than the other.  Most shrimp are from clear or even white (as with a grass shrimp) to orange and brown in color.

Shrimp enjoy living in sandy and muddy intertidal zones, bays and estuaries.  They call home inside burrows, which they share with other fish and invertebrates.  Their main meals consist of plankton and “detritus,” which consists of small pieces of organic plant and animal waste.

The best place to find shrimp (in addition to a few choice tackle stores) is along the shore of bays that contain exposed sand and mud flats.  Shrimp find it easiest to live in flats that are a combination of sand and mud–Most notably, an area where a 6” layer of mud has been deposited on top of a sand bar.  Low tide rising to a high tide seems to offer one of the best times to trap shrimp.

Look for shrimp under holes you find on the mud flats.  I like to try to find the holes that have a recent deposit of fresh sand around their opening.  Shrimp can be dug by hand, or most effectively, by using a hand suction pump.  You can purchase stainless steel pumps manufactured by Alvey, Australia, or you can build one yourself using parts purchased at your local hardware store.

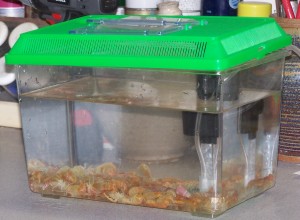
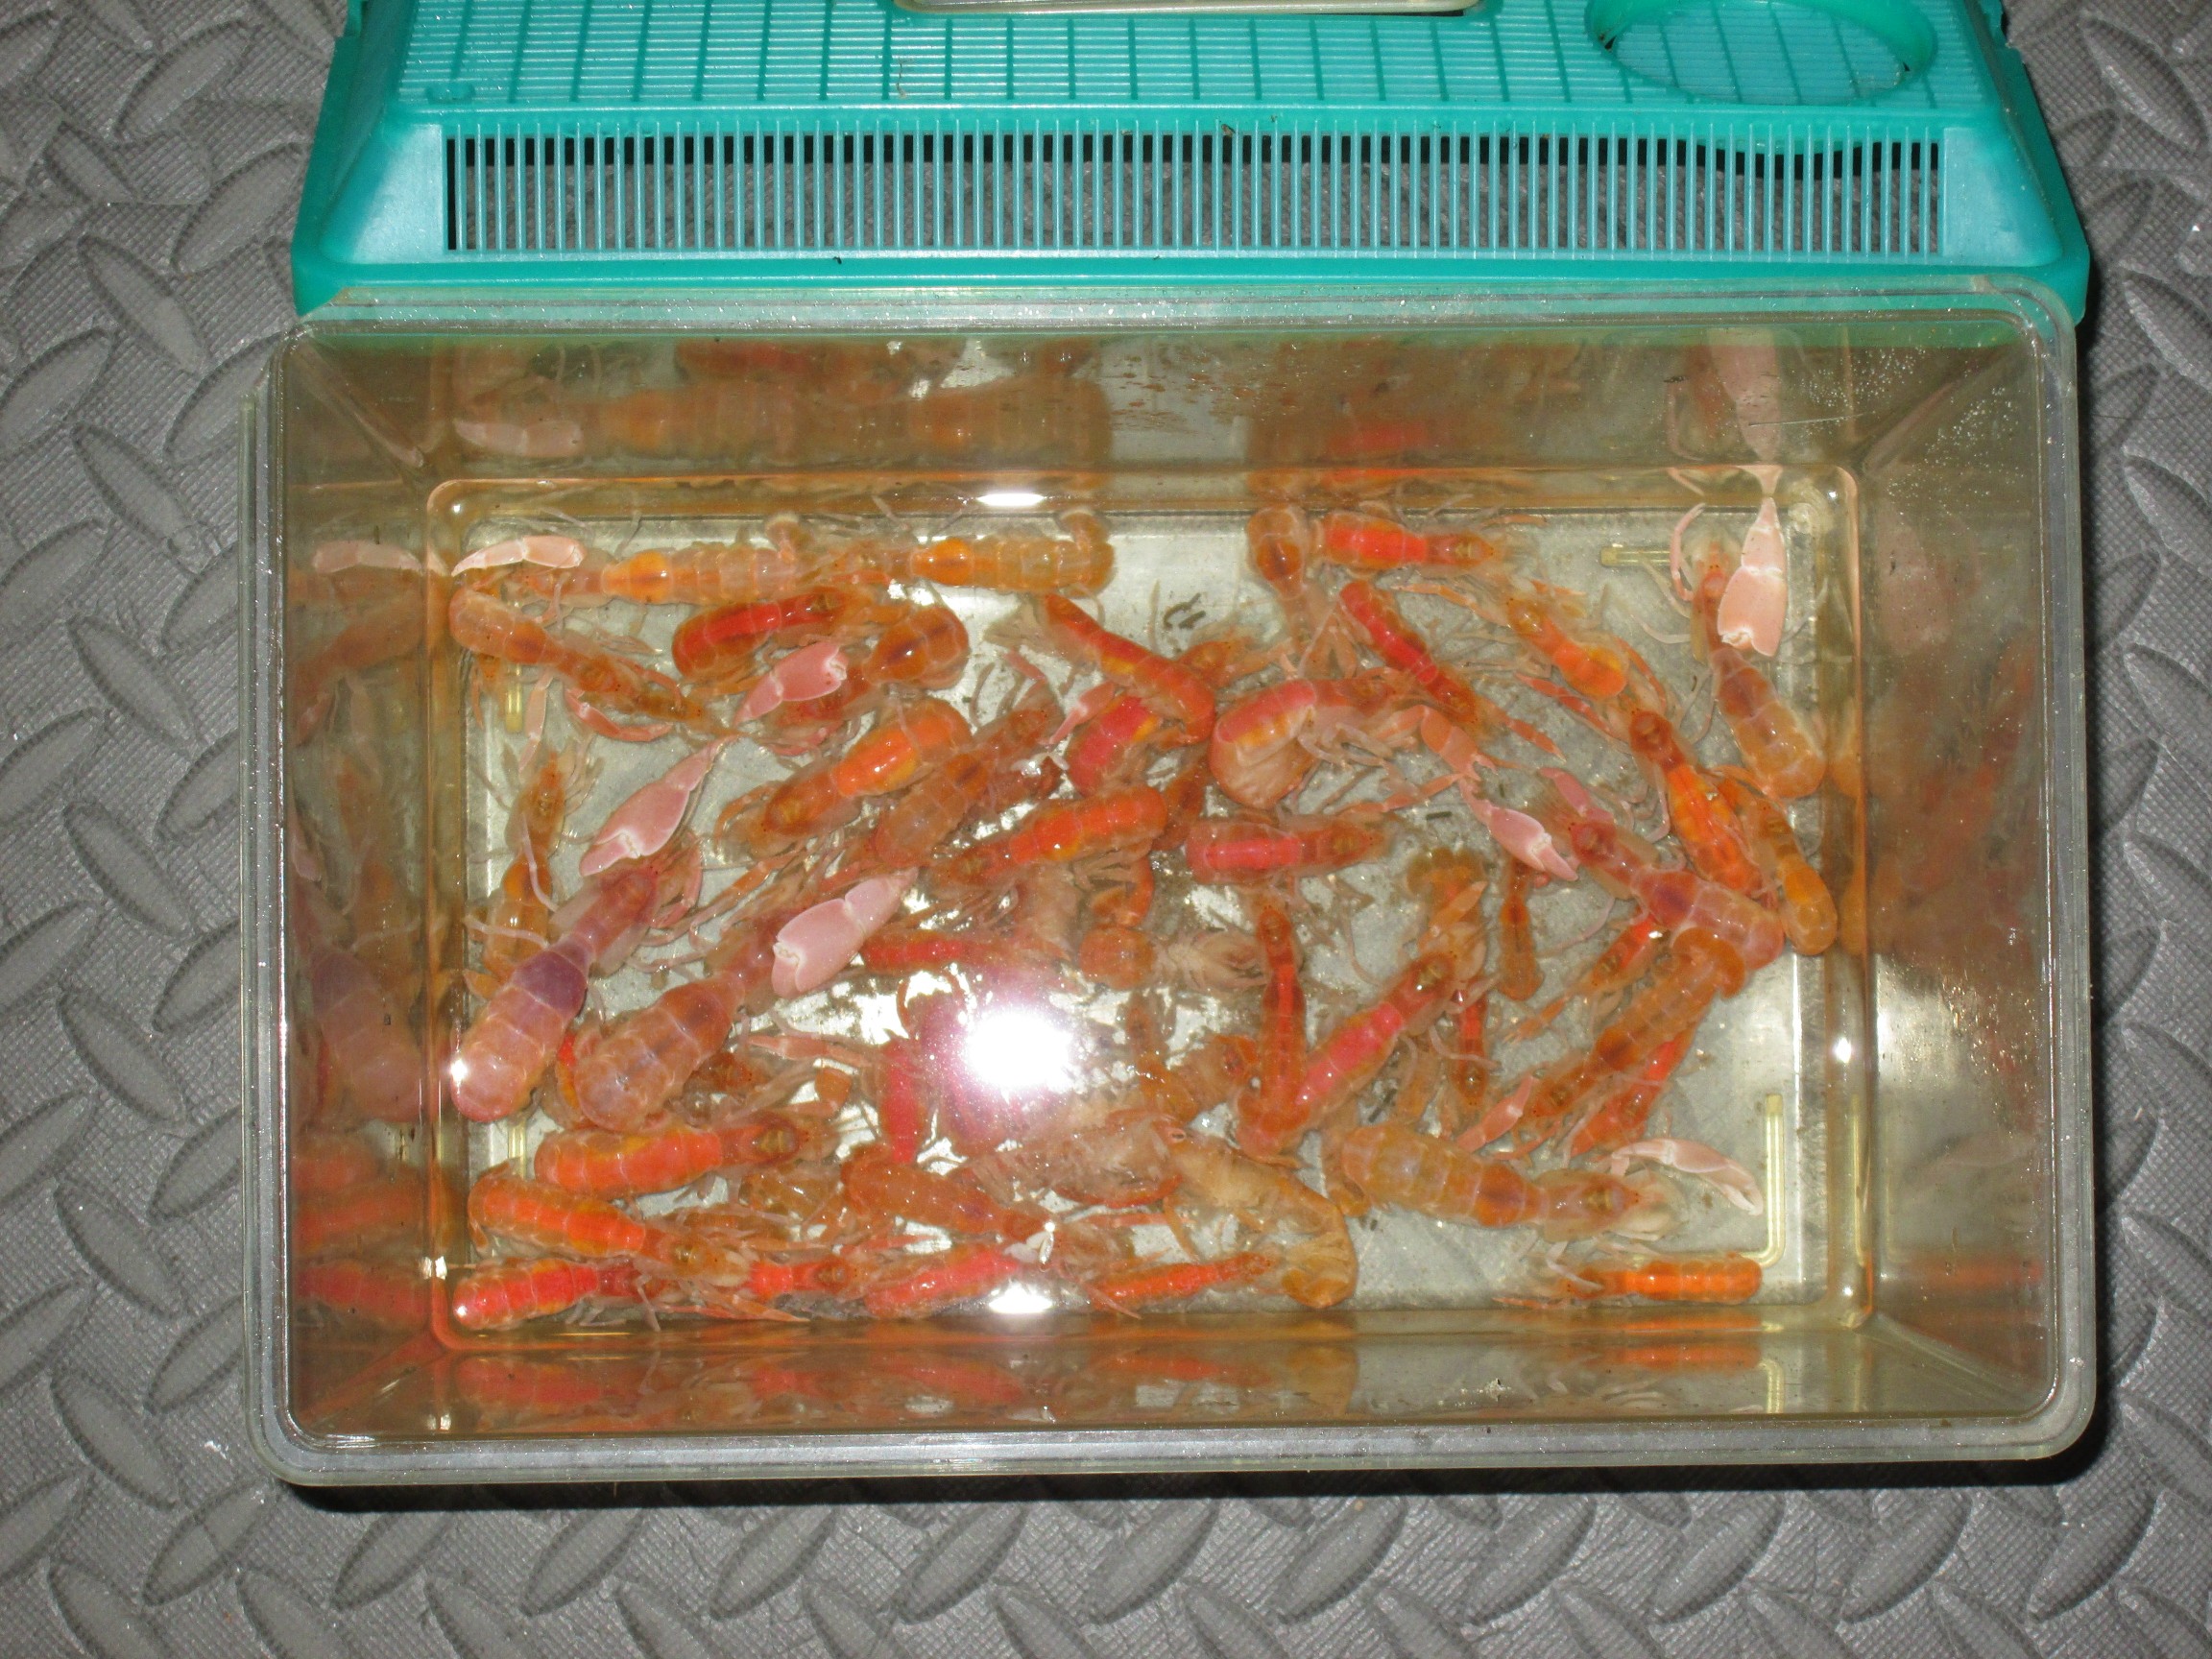
Ghost Shrimp AquariumShrimp are best kept in the refrigerator inside a plastic container with or without salt water.  Look for them to live about 3 days without water and about a week with it.  I use a five-gallon plastic aquarium to keep my shrimp fresh.  Water can be kept cold by placing one or two frozen water bottles inside a five-gallon aquarium or by placing the aquarium itself in the refrigerator.

Rigging your surf fishing set up for a ghost shrimp is easy.  I like to use the Carolina rig tied to 6lb monofilament fished on an 8’ rod matched to a 2500 series-spinning reel.  The Carolina rig is nothing more than a sliding sinker, a bead, a swivel, 18”-36” of 6lb fluorocarbon leader and a super sharp hook.   I like to use a #4 kahle or #4 sproat hook for shrimp.  You can get a good look at the rig by visiting the “rigging” page on my site at fishthesurf.com.

Ghost shrimp are fragile and can be tricky to hook.  The biggest reason fishermen don’t use this bait is because it commonly flies off the hook while casting.  Here are a few tips to help you securely hook the shrimp so they can be easily delivered right to where the fish are.

Use a long shank worm hook or Kahle hook for shrimp.  Turn the bait on its back and insert the hook into the underside of the tail.  Carefully, feed the hook up the center of its body.  Exit the “business” end of the hook, to just above the barb, just below the shrimp’s head, (through the carapace between it’s legs).  This method of hooking does two things: First, it allows the bait to lie flat on your hook (When the bait is flat it doesn’t spin and looks natural).  Second, this helps to secure the bait to your hook and reduce the number of times the bait flies off during a cast.

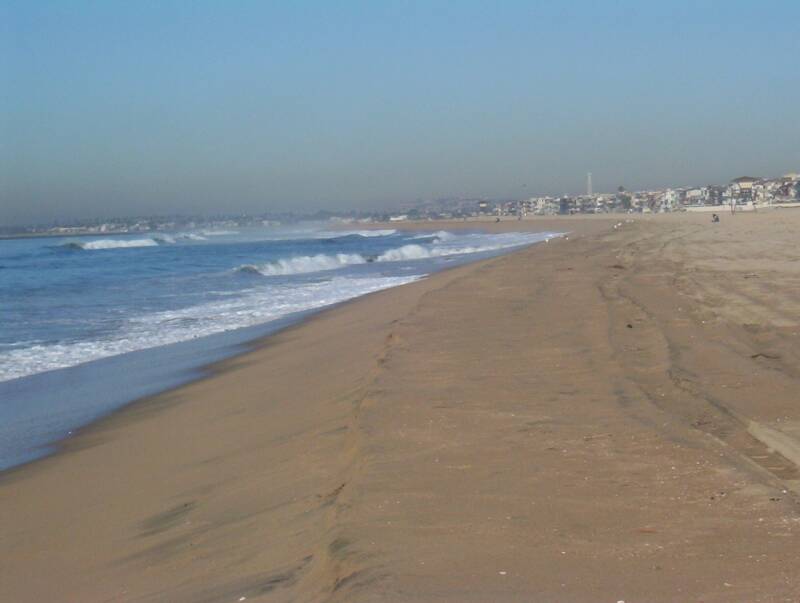
When fishing for corbina keep in mind that they will be feeding very close to shore.  I find the best beach to fish is one that is sloping and goes from shallow to deep with a slight incline.  The best tide to fish for corbina is from low tide, up until high tide.  This way corbina ride each successive wave farther up the beach as it is covered by water in search of food.

I fish shrimp very close to shore.  Not only because you can’t cast them a mile but also because the fish are feeding in close.  As a result, I generally use a longer 4 or 6lb fluorocarbon leader (24”+) and a very light egg sinker.  Split shot or a sliding egg sinker up to ½ ounce (at the very most) is just enough to keep your bait in the zone.

After I cast out slowly retrieve your bait, always keeping tight to your sinker.  If you’ve found the right place to fish you have just cast over the inshore trough.  As you reel back toward shore your sinker will fall and “catch” the side of the trough.  STOP HERE.  This way your sinker is lodged in the shore side of the trough and your bait (on that 24”+ leader) is waving back and forth across the trough like a soldier on leave!  That’s a corbina super highway with a lobster thrashing in melted butter right in the middle of the road!

GHOST SHRIMP ALBINODon’t ever reel your bait in until you see the egg sinker hit the sand.  So many big ones have been caught in just inches of water and you don’t want to be the one who sees their corbina shrug it shoulders, wave a fin and swim away.

Finding Halibut at the Beach

 Finding Halibut at the Beach

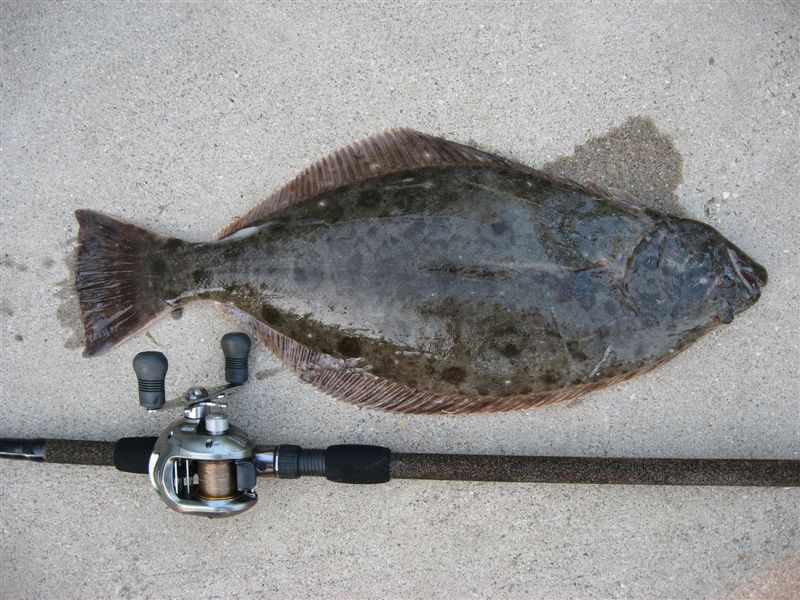
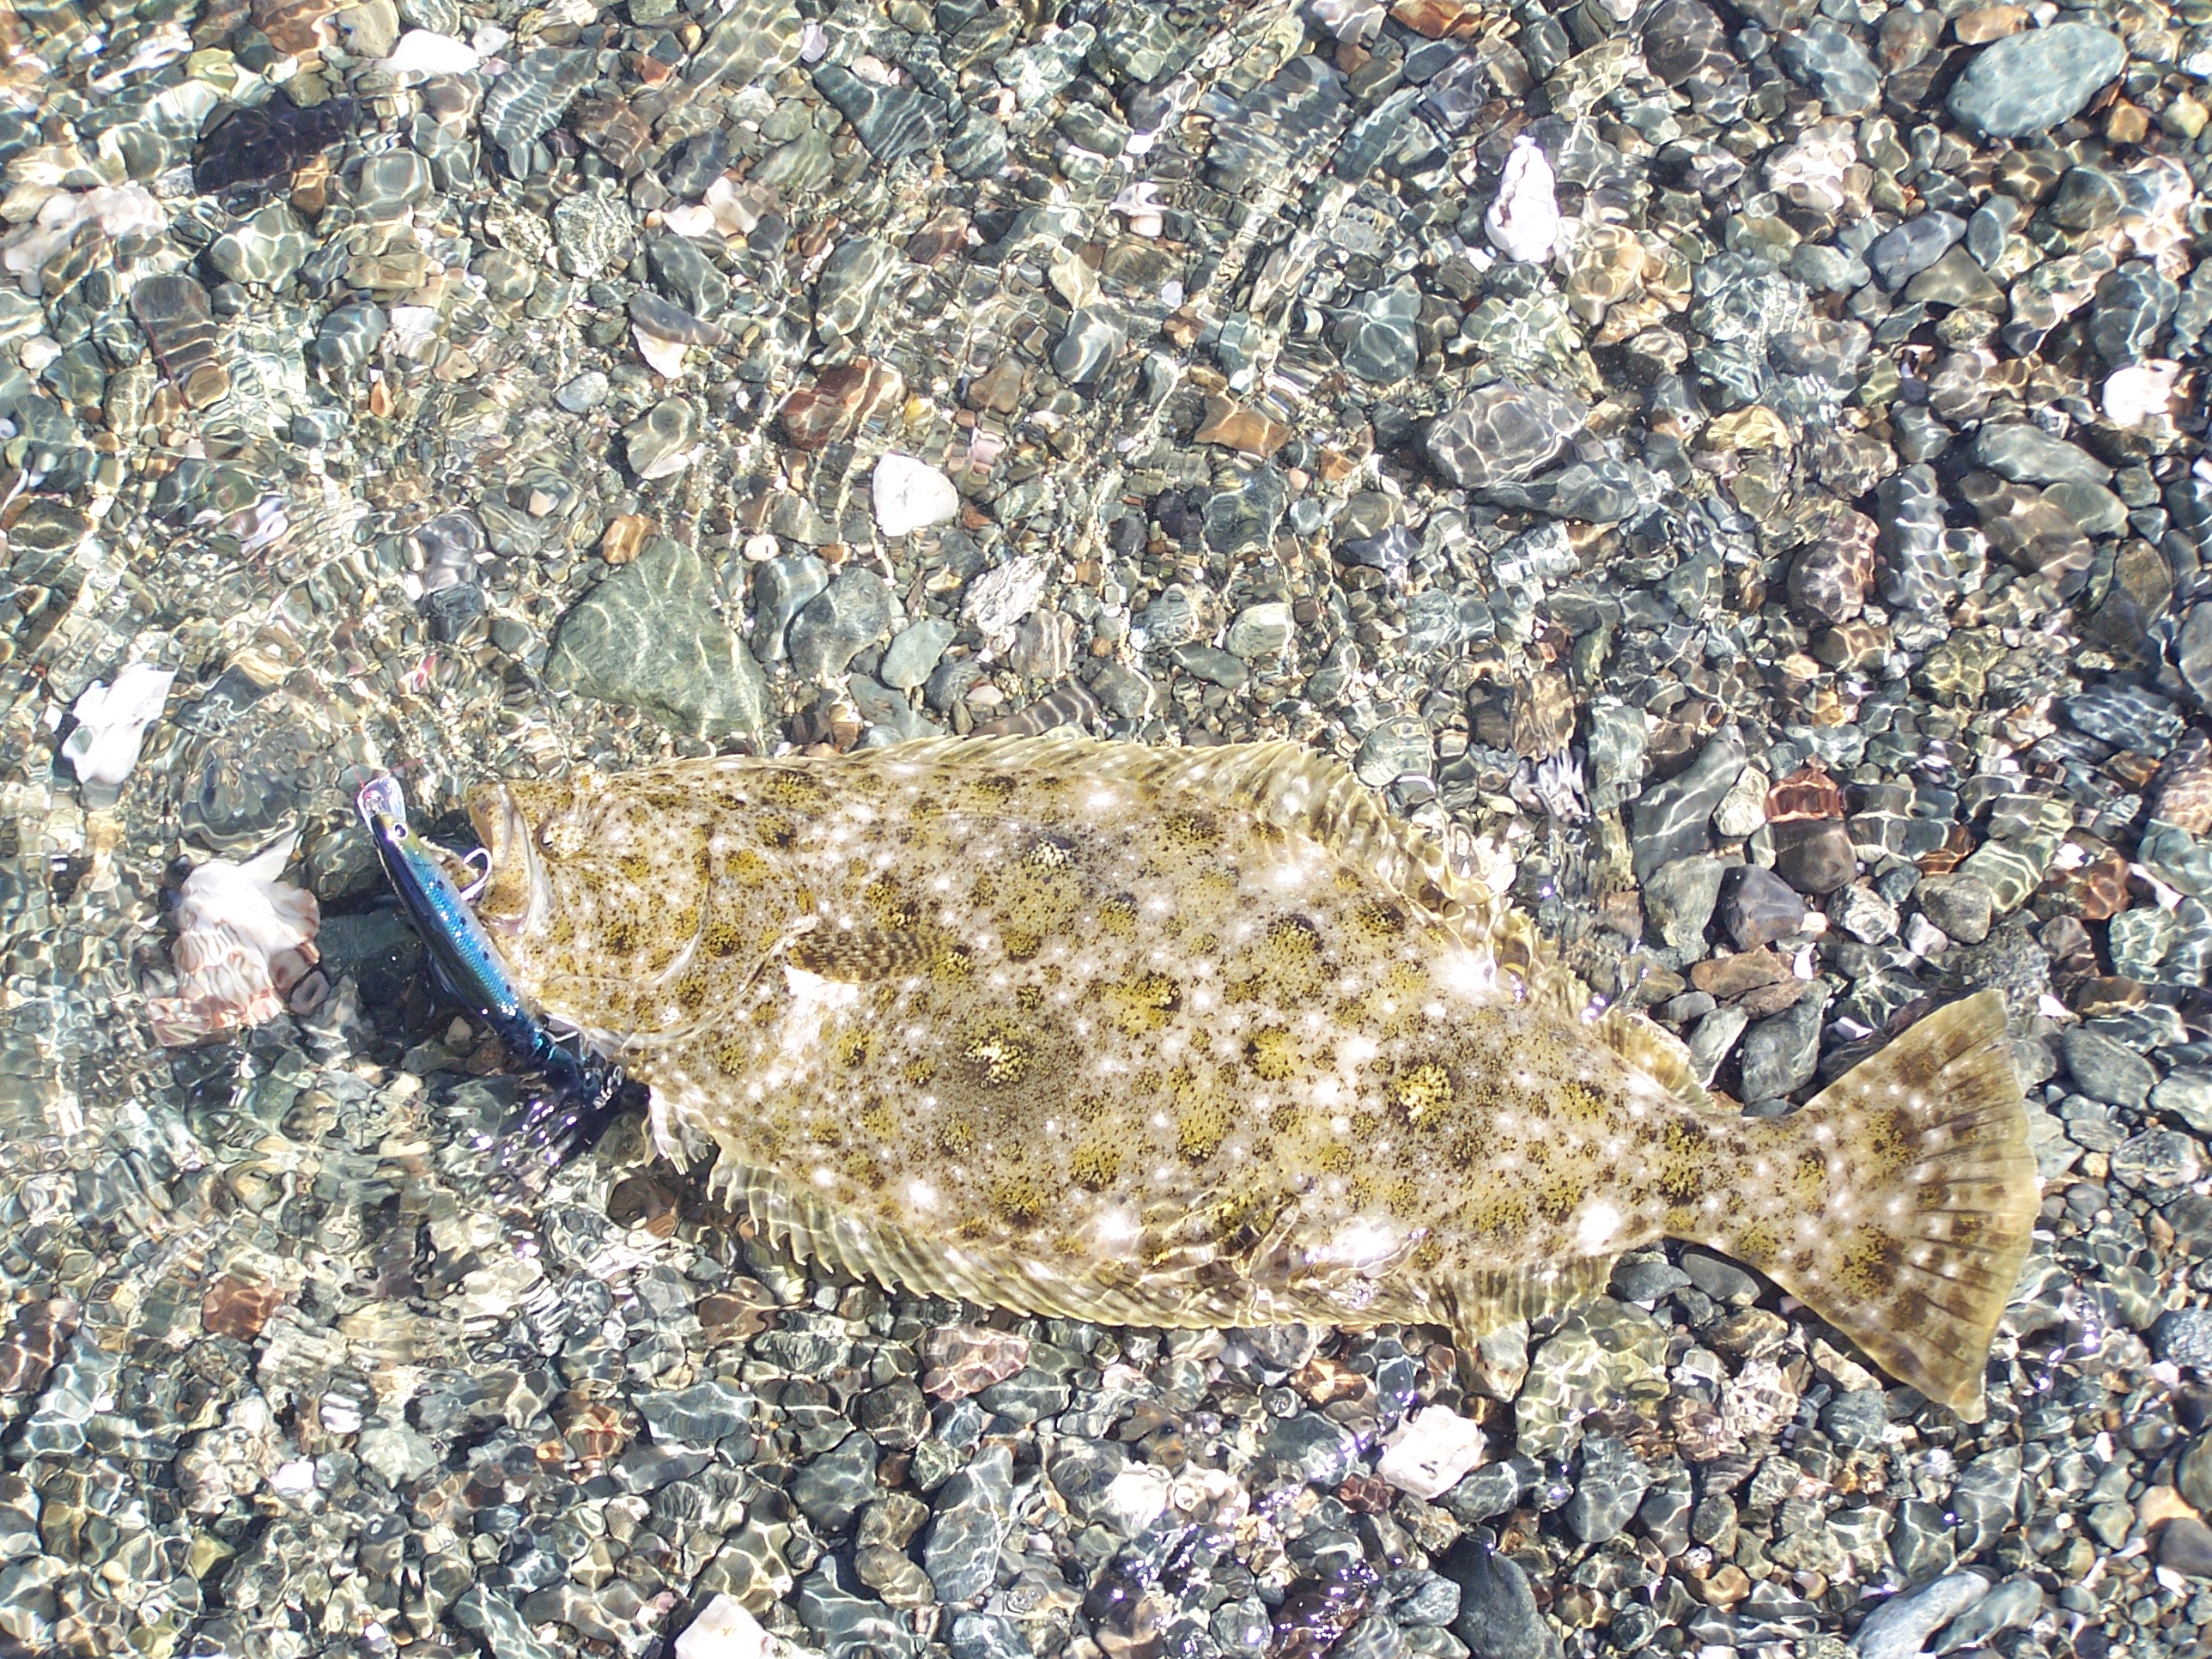
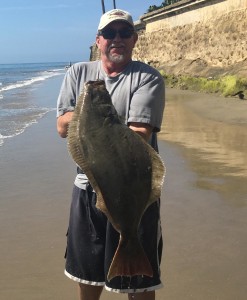
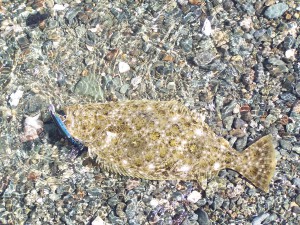
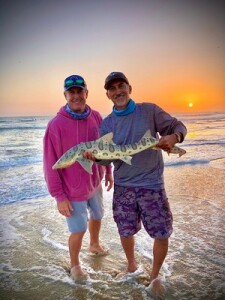
ANDRE HALIBUTI’m often asked: what is the best tasting fish from the surf?  Well the truth is, I release all of my fish back into the water with one exception—the occasional legal halibut.  And it seems like I’m not alone.    California’s Department of Fish and Wildlife (formerly Fish and Game) has stepped up their monitoring of halibut fishing this year in response to concerns about over fishing–All the result of so many anglers turning to halibut because of rockfish closures along the West Coast.

Fortunately, halibut fishing from the surf has been exceptional over the last four years.   In fact, it seems to be getting better every season.  In order to target halibut here are a few tips to help you find them at the beach.

Best Places to Find Halibut

Some of my favorite places to fish for halibut are along the open beach, around jetties and near estuaries and river mouths.

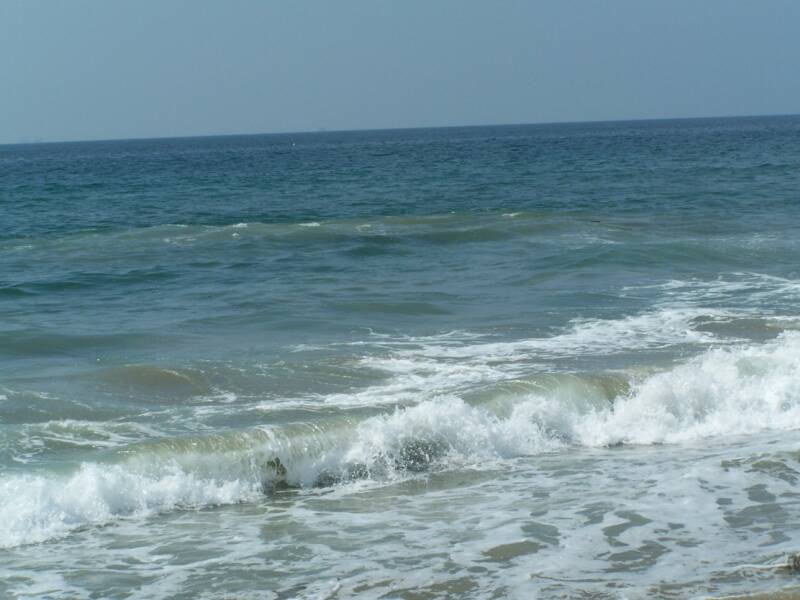
Open beaches offer a challenge when targeting halibut. When you reach the beach find a high spot near the water’s edge and look up and down the beach for signs of fish.  Because surf fish congregate near areas of jumbled or foaming water look for small rip currents that form just off shore.  Another area to target is offshore structure including holes, troughs, kelp beds and reefs.   Once you spot these areas, cast your bait or lure along the edge of a rip current, structure or where rocks meet sand–this is where fish will be waiting to ambush bait.INSHORE_TROUGH_1_op_800x599

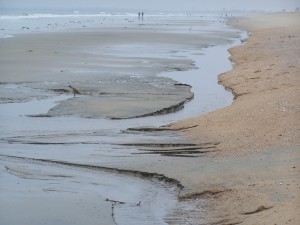
Halibut also congregate in the offshore troughs that are built just below the waves.  These troughs are easiest to find at low tide and run parallel to the beach.  One trough will form outside where the waves break farthest out from the beach, another trough will form where the waves break (during high tide) near the shore.  Cast over and drag your bait across these troughs to entice halibut to bite.

Open beaches that have a rocky point adjacent to them are also great areas to target fish.  Find where the sand meets the rocks and fish along this area.  Halibut commonly lie-in-wait to forage along these edges.

Jetties also offer some great opportunities to catch halibut because they provide both habitat and a food source.  As with open-beach fishing, it’s always smart to cast along the edge of rock where it meets sand to find the fish.  But there are some subtle differences to also look for when fishing along a jetty.

When approaching the base of the jetty, where it meets the sand, look out to sea and make note of the direction of approaching waves and swells.  If the waves are approaching the jetty from the right, a natural eddy will be generated on the jetty’s opposite side (left side).   If waves are coming from the left, an eddy will form on the jetty’s right side. JETTIES_op_800x603

Eddys are much like a rip current and are characterized by swirling, foaming off-colored water.  Fish congregate in an eddy where moving water churns up bait and allows them to stay hidden while they wait to ambush food.  Once you find the eddy, fish along its edges and cast through the middle to find the fish.  Don’t be surprised when the tide or swell direction changes and the opposite side of the jetty becomes the best place to fish.

Estuaries and river mouths are almost always connected as a way for fish to run from the warmer breeding grounds of the estuary out to the open ocean.  The California coast was once littered with hundreds of natural estuaries that acted as rockeries for growing fish stocks.  After unprecedented development and growth many of these breeding grounds were filled or closed off to ocean circulation.  Still there remain a few in almost every beach community that offer fantastic surf fishing.

When approaching an estuary and river mouth area use the same rule of observation as with jetties—determine the direction of the swell and current and how it effects water movement. Tidal flow will have a much bigger effect on fishing the river mouth.  A high going to a low tide will pull water out of the estuary and toward the open ocean.  A low going to a high tide will push water and waves up into the estuary and change the direction and movement of fish.

Again, look for the formation of eddys.  On an upcoming tide, an eddy may form just inside the river mouth.  As tide recedes, an eddy may form just outside the river mouth in an area of open-ocean.  Fish your bait along this edge and allow it to be pulled by the tide and current into the strike zone.  Try to stay away from areas where the water is moving quickly as fish here will not be able to catch up with your bait.

The best way to become familiar with good fishing areas is by looking up your favorite strip of coast at: http://earth.google.com/ and mapping out a strategy for fishing.   At this site you’ll be able to zoom into any coastline on the planet and find the best spots to fish.  Look for areas where jetties and river mouths meet the beach.  You can also find areas where there are large inshore holes or sand bars, points, kelp and reefs.   Take some time to research your areas and you’ll have a lot more luck with a lot less gas!

Next time we will look at the best times, tides and baits to use for catching halibut in the surf.  Until then, I’ll see you at the beach.

Extra info for the readers?    Hot Surf Tip: The best time to fish for halibut is just after the grunion run.  As grunion come ashore so do halibut to feed.  A good run holds halibut near shore for up to two weeks as they search for bait, spawn and digest what they have found.  Grunion, anchovy, sardine and many spoons and hard baits work great at these times.

Halibut Facts:  The current pending record for California halibut is held by Frank Rivera of Camarillo, CA.  His fish was  67.3 pounds and landed on Friday, July 1 off Santa Rosa Island while fishing aboard the Mirage out of Oxnard.

Know your regulations:  28.15. HALIBUT, CALIFORNIA.  Limit: Five in waters south of a line extending due west magnetic from Point Sur, Monterey County, and three in waters north of a line extending due west magnetic from Point Sur, Monterey County.  Minimum size: 22” in total length.

Another halibut falls for the lucky craft!

Another halibut falls for the lucky craft!

Bait Presentation at the Beach

Bait Presentation At The Beach

INSHORE TROUGH

      I’ve always said that the most important thing in surf fishing is having a sharp hook.  So the second most important thing must be bait presentation.  Presenting your bait in the most natural manner so that fish don’t know the difference between a bait with a hook in it and one without a hook is guaranteed to catch you more fish.  More importantly, hooking your bait so it looks like it just crawled out of the sand will not only help you catch more fish but is sure to help you catch big fish too.

Here are a few rules that I like to follow that help me weed out the small ones and attract the biggest fish to my bait:  Make sure that your bait is correctly positioned upon the hook so it does not spin.  Check your bait frequently while fishing and adjust it when necessary.  Always place your bait so it lays flat on the hook.  Any curve in your bait will make it spin and therefore much less attractive to fish.  After hooking your bait pull it through the water in front of you to make sure it doesn’t spin.

Match your bait (both natural and artificial bait) in both size and color to what is currently living in the area you fish. This will mimic the natural size and color of forage. If the crabs in the area are green and brown or the clams orange and red, try those colors.  To be most effective, always carry more than one type of bait and know how to use them.SIDEWINDER_CRABS_07

Fan cast:  cast straight, cast right and cast to the left at multiple angles to cover the largest area as you search for fish.  It’s always easier for the fisherman to find fish than it is for fish to find you.

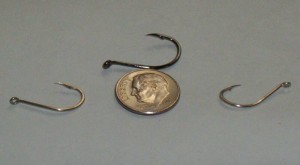
Use the sharpest thin wire black hook possible.  Always be sure you are using the sharpest hook possible. I said that twice because it’s soooooo important!  I like to use the following hooks for surf fishing: For small baits like crabs and grubs I like to use a #1, 2 or 4 Owner mosquito light, Gamakatsu split shot or Mustad ultra point octopus hooks.  For longer baits like worms or ghost shrimp I prefer a #2, #4 Mustad sproat or kahle hook.

The night before your surf fishing adventure take a little time to tie several lengths of leader placing them on a leader holder.  Use four or six pound fluorocarbon leader, a small black barrel swivel and a sharp hook.  This way you’ll be ready once you hit the beach and not wasting time tying leaders while the fish are biting.

After casting out, always be sure to keep your line tight to the sinker by reeling up any slack.  This will help you to feel the bite and catch more fish. It will also help prevent your line from fouling in the surf and give your bait a much more realistic presentation.

Once you’ve cast out, try reeling the bait in slowly using a stop and start motion with your reel.  Vary the speed of your retrieval.  When using lures try a very fast and slow retrieval speed as well.  Also, utilize a sweep to the side motion, then reel up slack and repeat.  This stop and start motion entices fish to follow and strike.  Let the fish tell you which retrieve style to utilize.  Once you get bit remember what action it was that convinced the fish to strike.

You will always catch more fish if your line is tight and straight in front of you.  If there is a long-shore current, pulling your line up or down the beach, try this technique:  Cast your bait up into the current and let the drift push your bait down the beach.  As your bait moves down the beach walk along to keep the line in front of you by reeling in any slack.  Once the bait comes too close to shore, reel in, walk up the beach and repeat. Be aware that fish will frequently be foraging in the inshore trough that may be just a few feet in front of you. Don’t give up on your retrieval until you see your bait on the sand in front of you.

If, after fan casting an area you don’t find fish, move down the beach.  I usually move about 100 yards, observing the water as I go for indications of fish, structure or eddy currents.  I try fan casting and moving until I find biting fish.  Remember, fish move frequently and may congregate in schools to feed; you’ll also need to move for improved success.

Check your main line and leader frequently for knots and damage that may occur from contact with rocks or structure as well as the abrasion that catching fish produces. Also inspect your knots after catching a large fish. There is nothing more disappointing than hooking into the fish of a lifetime only to loose it due to a line or knot failure. If you find any damage, replace the leader, as it is your direct connection to the fish.

Be continuously observant about exactly what you were doing when the fish took your bait. How far out, what angle, speed of retrieval, any currents present, is there a trough, sandbar or structure, color of water, etc.

By using a few simple presentation techniques your bait will take on a more natural look and become more effective for catching the bigger fish in the surf.  Treat every outing as a learning experience and you are certain to become a more proficient angler while all the while increasing your enjoyment of this great sport.


Surf Fishing with Grubs

Surf Fishing with Grubs

By Bill Varney, Jr.

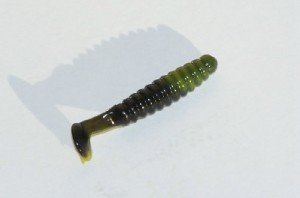
GREEN_CAMOUFLAGE_GRUB

As the warm water of fall begins to cool sand crabs go into hibernation. Meanwhile, surf fish continue to scour the surf for any forage to carry them though the year.  Because food becomes scarce in the winter months fish are always looking for an opportunity to find something good to eat.

That’s why so many artificial lures work well during the winter.  Native baits are scarcer during this time but fish still need to eat.  So an enticing meal swimming by may get a bite.  One of my favorite lures to use for a variety of surfperch in the winter months are surf grubs.  Although they work year-round, they seem especially effective during cold-water months.

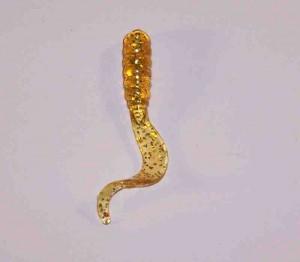
CURLEY_GRUB

Plastic grubs come in two distinct shapes: Curley tail and swim tail varieties.  I like to use both shapes in the surf.  The curly tail imitates a small baitfish while the swim tail adds a thumping vibration to the presentation.  One and one-half to three inch grubs seem to work best in the surf.

Use different grub colors depending on the color of the water you are fishing.  With waves crashing and churned turbidity, most surf fishing areas have cloudy water. Fish cannot easily see whites and muted colors.  Dark colors, which cast a more enticing shadow, match surrounding bait and work best.  Motor oil, red flake, gray flake, brown and orange seem to work well.

Tip:  The most productive grub colors are:  Smoke with glitter, motor oil glitter, watermelon/chartreuse, pearl green/silver glitter, sour grape/purple, caterpillar/yellow and green, avocado, green pumpkin, green/pearl and pumpkin with black flake in both curly tail and swim tail varieties (and all colors which mimic the color of bait that naturally occurs in the local environment)

For the best chance of catching fish always be sure to use colors that resemble the colors of food that occur naturally in the area you are fishing.  This is true for all lures used in the surf.  Take a look at the bait you find at the beach.  Mussel and clams have a brown and orange colored meat, sand crabs are gray and sidewinders crabs are motor oil green and brown.  These are the colors you should use as they best imitate the colors of forage living near and on shore.

Some of my favorite grubs are manufactured by Kalin and Slider grub companies.  Be sure to pick up a variety of colors and fell free to try several out once you reach the beach to find out what fish are eating that day.

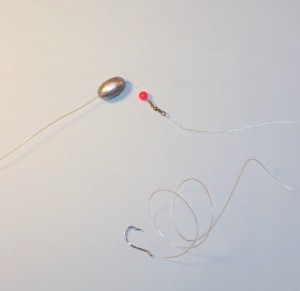
The best way to present grubs to hungry fish is on the Carolina Rig.  This is a simple rig and is made up of a sliding egg sinker, a 6mm bead, a swivel, leader material and a very sharp hook.CAROLINA_RIG

Your sinker size will depend on how much current or wave action you have at the beach.  On days when the surf is four feet or larger I use a heavier sinker of up to one ounce.   On days with smaller surf I prefer to use a one-half or three-quarter ounce sinker.  Remember, it is very important to keep your bait on the bottom, as this is where fish feed, so having a bit heaver sinker is much better than too light.

Beads used between the sinker and swivel help to control the amount of sand which may build up inside the sinker.  I like to use a 6mm red or orange bead in the winter and a clear bead in the summer.  When fishing for summer corbina it is important to hide your rig as well as possible.  Whereas, during winter the colorful bead helps to attract perch and other fish.

Your swivel and leader would be next.  I use a number twelve black swivel and six pound fluorocarbon leader material.  Black reflects little light and looks natural in the sand while fluorocarbon is invisible (or so they say!) and is very abrasion resistant.

At the end of my leader is a sharp hook.  Sharp hooks may be the most important part of your rig.  See, I said the words “sharp hook” twice because it’s so important!OCTO_HOOKS_op_800x442  There are several good hooks available on the market but my favorite are black, size two or four, Gamakatsu split shot/drop hooks, Owner mosquito hooks or Mustad ultra point hooks.  All three are thin wire hooks that are very sharp and work perfectly with grubs.

Now that you have the rig set up it’s time to hook the grub.  Grubs must be placed on the hook so they lay as flat as possible.  Any small turn in the grub will cause it to spin and not appear natural.

The first step in hooking a grub is to place the hook against the bait to see where the hook’s end will punch through the grub body.  Next, check the grub to see if it has lines, like a seam, left by the mold.  If so, be sure to center your hook between those lines.

Holding the grub between thumb and forefinger insert the hook into the center of the head and pull the hook toward the tail making sure to keep it centered in the grub.  Once the hook is far enough down so the eye of the hook is now at the head of the grub exit with the hook’s sharp end.  Now that the hook’s shaft is buried in the grub stop and pull the grub back toward the eye.  This will even-out the grub and help to keep it flat on the hook.CALICO PERCH 1 4 14

Think about presentation—the more the grub looks like it’s flat and freely moving through the water (without a hook) the better chance you’ll get a bite.  Take a moment to pull the grub just underwater in front of you and make sure it swims freely and doesn’t spin.  Now you are ready to cast out.

Now that you know how to rig a grub the next step is finding the best way to present this bait to surf fish.  Using the grub allows you to cover the greatest area and search for fish.  Begin by fan casting—that is, casting to the left side, straight out and to the right.  Try to cover as much area as possible.   If you don’t get bites after ten minutes move down the beach and try again until you find the fish.

Let your bait sink to the bottom and slowly retrieve it back.  The colder the water the slower your retrieve should be.  When the waves are pulling back, wait a moment during the retrieve and let your bait rest—you can expect bites here as fish are pulled by the current past your bait.  Always keep your line tight to your sinker and your bait on the bottom.

Lastly, comes the dippin’.  I place about two ounces of fish attractant in a small snack size zip bag.  My favorite fish attractant without question? Taco shop hot sauce!  I use two packets (can’t tell if I like Taco Bell® or Del Taco® the best).  Just dip your grub (or really any bait) into the sauce and cast it out.  Every few casts take a moment to reapply.  You’ll be amazed by how many more fish you catch with this simple addition.  Please believe me—it really works!

Halibut, barred surfperch, yellowfin croaker, walleye surfperch and many other surf fish are attracted to grubs.  Although grubs work all year long they seem to work their very best in winter when bait is scarce and fish are hungry.

Tip:  All perch like grubs but especially the small fast ones.  To catch the biggest surfperch use your grub to find the fish.  Once you have a good bite going, switch to a live bait like the sidewinder (lined shore) crab.  SIDEWINDER BAITOnly the largest perch will bite this bait.  How do we know that?  Because the last two state record barred surfperch were caught on them!

Ten Tips Before You Hit The Beach


Surf Fishing  Be Prepared: Ten Tips Before You Hit The Beach

 PERCH_ON_SHRIMPCLAMS BIG LITTLENECKS 10 08CORBINA_CAL_5

Nothing is worse than hitting the beach for a great surf fishing session and having your equipment let you down.   By preparing a few important items before you reach the beach you’ll be guaranteed to have a much better chance of catching fish.  Here are my top ten tips:

Start preparing the night before. Being well organized and properly prepared will ensure that your chances of catching fish will measurably improve.    Start with your rod and reel.  Check your reel for smooth operation (especially the drag, which is critical in maintaining control of the fish on light-line).  Make sure your line is fresh and in good condition.  Next, check your rod and make sure the reel is tight on the seat and that your guides are in good working condition.

 Get your bait ready.  If you’re using clams or mussel, shuck them and put them in small zip top bags before you go.  You don’t want to be fiddling with a knife in the dark or when you could be catching fish.  If you have live ghost shrimp put them in a small container of cool water.  Place a frozen bottle in the water overnight and you will have lively, crisp shrimp in the morning.  If you have collected sand or sidewinder crabs, flush them with cool salt water twice per day and keep them in a cool place until use.  When it comes to grubs and artificial lures know in advance what you want to use.  Don’t waste time fooling around with your bait at the beach.

 Pre-tie leaders.  Tie several lengths of leader with different sizes and types of hooks.  In the surf I like to use hook sizes 1, 2 and 4 (depending on bait size) and a Owner Mosquito, Gamakatsu spit shot/drop shot or octopus hook.   Use leader material appropriate for the areas you will fish and the target species. Organizing these on leader holders will keep them from getting tangled and make it easy to replace broken or knotted leaders.

 Figure out what to wear in advance.  You may like waders or a wet suit but here’s how I usually dress for the beach:  In winter, I always try to stay dry.  It seems the best time to fish is often at high tide so little wading is needed.  I’ll wear sweats or jeans, old tennis shoes and socks.  There’s a good chance your feet will get wet so an old pair of shoes is best.  If you prefer you can wear calf length “mucking boots” just watch the surf so it doesn’t come over the top of your boot.  On top, wear enough layers and you’ll be warm at sunrise and can peel down as the beach warms up.  In spring, summer and fall I like to wade and fish at all tides.  Shorts and trunks work great with bare feet or strap sandals (if you’re fishing on the rocks).  A “T” shirt accompanied by a light jacket or windbreaker with pockets to hold your gear.

 Get your camera and batteries ready.  I like to use a plastic zip bag to carry my camera in.  This helps keep the sand and salt off your equipment.  Always clean your lens the night before with an appropriate lens cleaning paper or cloth to be sure there are no spots on the lens to obscure your pictures.  Don’t forget to check your batteries tonight so you know your camera works tomorrow.

 Organize and put your tackle in a tackle bag. Always be prepared but travel light.  I like to use a small bag that straps around my waist or a tackle wallet that hangs from around my neck.  Inside the bag I’ll have:  

10   # 10, 12 or 14 swivels,  10 6mm beads (5 clear/ 5 red),  Small spool of 6lb fluorocarbon leader, 6 #1, 2, or 4 Mosquito or Drop shot/split shot hooks,  6  #2 or 4 Worm/Ghost shrimp hooks (Kahle or Sproat) , 6 Pre-tied leaders on 2 leader holders,  1 Small zip bag with grubs and flies,  1 Small zip bag with hot sauce for dippin’,  6 Egg sinkers 1/4th – 3/4th oz 

Check the beach conditions.  Look at weather, wind and swell reports on sites like:    www.fishthesurf.com, www.swellwatch.com , www.surfline.com, www.weather.com  (and many others).  From these sites you’ll learn how to plan for the beach based on the conditions.  For example, if it is going to be windy I would look for a spot near a jetty protected from wind, or on a day with strong surf, I might start fishing in a sheltered area or protected cove.  It’s smart to check out a live camera which focuses on the beach you will be fishing the day (or several days) before you go.   This way you can see the size of the surf, know when it gets crowded and the entire day’s wind conditions.

 Check the swell conditions.  The size of surf is always important to surf fishermen.  You want the surf to be between one and five feet.  If the surf is too small little water will be moving and you’ll find few fish.  Waves over five feet will create a current that makes catching fish much more difficult.  You will also want to determine the direction of the swell.  If the swell is from the south you can assume it will be pushing warmer water up the coast (which is good) but may also make some areas unfishable.  Take time to familiarize yourself with your favorite spots during different swell conditions.  By checking websites like www.wetsand.com you can use graphic forecast models to predict swell size and direction, days before heading down to the beach.

 Check the tides.  Only the use of sharp hooks is more important than this one.  Knowing the best tide for your spot will be the difference between catching fish and getting “skunked.” I use a tide graph like the one on my site so I can see the tides over a seven-day period at a glance.  This makes it easier to know when the right tides are for the best fishing and will allow you to plan ahead with confidence.  I’ve found that if the beach has never been dredged and has natural structure (like kelp and rocks) it can be fished at both high and low tides.  But in areas that have been dredged I mostly fish between two hours before to two hours after the high tide.  This is when the greatest amount of structure is covered by water and provides inshore troughs that hold fish. 

 Check the weather. Find out if a storm is coming or if the wind is going to be up.  There’s no reason to go to the beach as waves of rain roll in–but there are times, just hours or days before a storm, when the change in barometric pressure caused by the approaching low triggers a signal for fish to eat and then go wide open!

 Visit sites regularly that include reports, postings and other educational information.  This will help to make you a better fisherman.  For catch, conditions and pictures of fish caught today try:  www.scsurffishing.comwww.fishingnetwork.net, www.allcoast.com, www.bloodydecks.com    While sites like www.fishthesurf.com and www.dfg.ca.gov/marine/mpa will provide you with information about MLPA closures and where it’s permitted to fish.

Surf Fishing Kauai, Hawaii


Surf Fish Road Trip
Surf Fishing in Kauai

“When the winds of winter whip across the beach we sometimes dream of the warm invitation of tropical places.”Every time I go surf fishing in the Hawaiian Islands I’m always amazed by how many new things I learn. Although the islands are surrounded with some of the best surf fishing shoreline in the world, they are rarely crowded. You won’t find a more peaceful and beautiful place anywhere to spend the day fishing.Great areas for fishing from both the beach and the rocks surround the islands. The best surf fishing areas vary by the time of year and the size of the surf. During winter, the Hawaiian Islands receive most of their surf on the North and East facing beaches. In summer, the Islands experience surf from the South. That’s one thing an island has to offer—if the surf or wind is too big just drive to the other side!I still have a great many miles of shore to explore in Hawaii but one of my favorite places to surf fish is along the East and Northern shore of Kauai. In late December our flight landed in Kauai and after a short walk to the rental car we were off the plane and on the road to Kapaa.Kapaa, on the East side of Kauai, is a small town perched upon a point and surrounded by long sandy beaches. This area is well know for the Wailua River which flows from the mountains and opens up to the sea here. We’ve always found this a great place to stay as it is quiet, has every store you may need and is away from the vast hordes of tourists that inhabit the Island’s South side.

Kapaa also offers great fishing and quiet relaxing beaches. For years, we have stayed at the Wialua Bay View Condos located adjacent to Wailua Beach. The accommodations, which included a 1 bedroom condo with full kitchen, bath and fold-out couch are perfect for a family of four and reasonably priced at less than $175.00/ night. Just steps from the beach, this is a great home base where you can enjoy the beach or explore the island to find it’s many surprises.

Our first day’s adventure started on the beach just below our condo where we could fish both sand and rocky areas. On the open beach I like to use 6-8lb test and the Carolina Rig. Over the last few years I’ve tried many different baits including shrimp, grubs, squid, octopus and Berkley’s Gulp!. They all seem to work well with many natural baits available right in the local grocery store.

Fishing “condo point” I like to use a very light-sliding sinker on my Carolina Rig so as not to get snagged in the rocks. Casting out along the edge of the rocks produced bites on both grubs and bait.

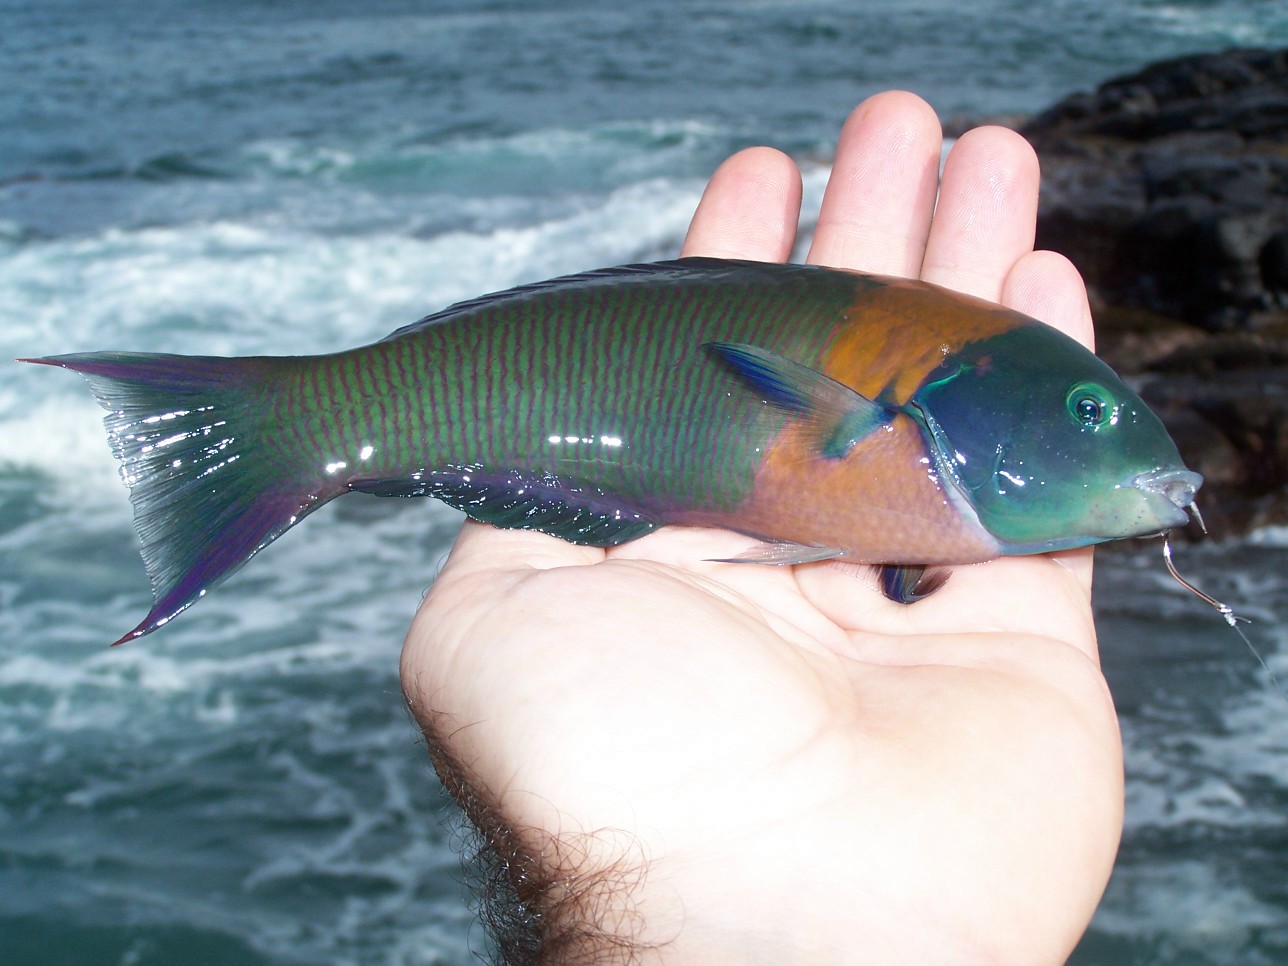
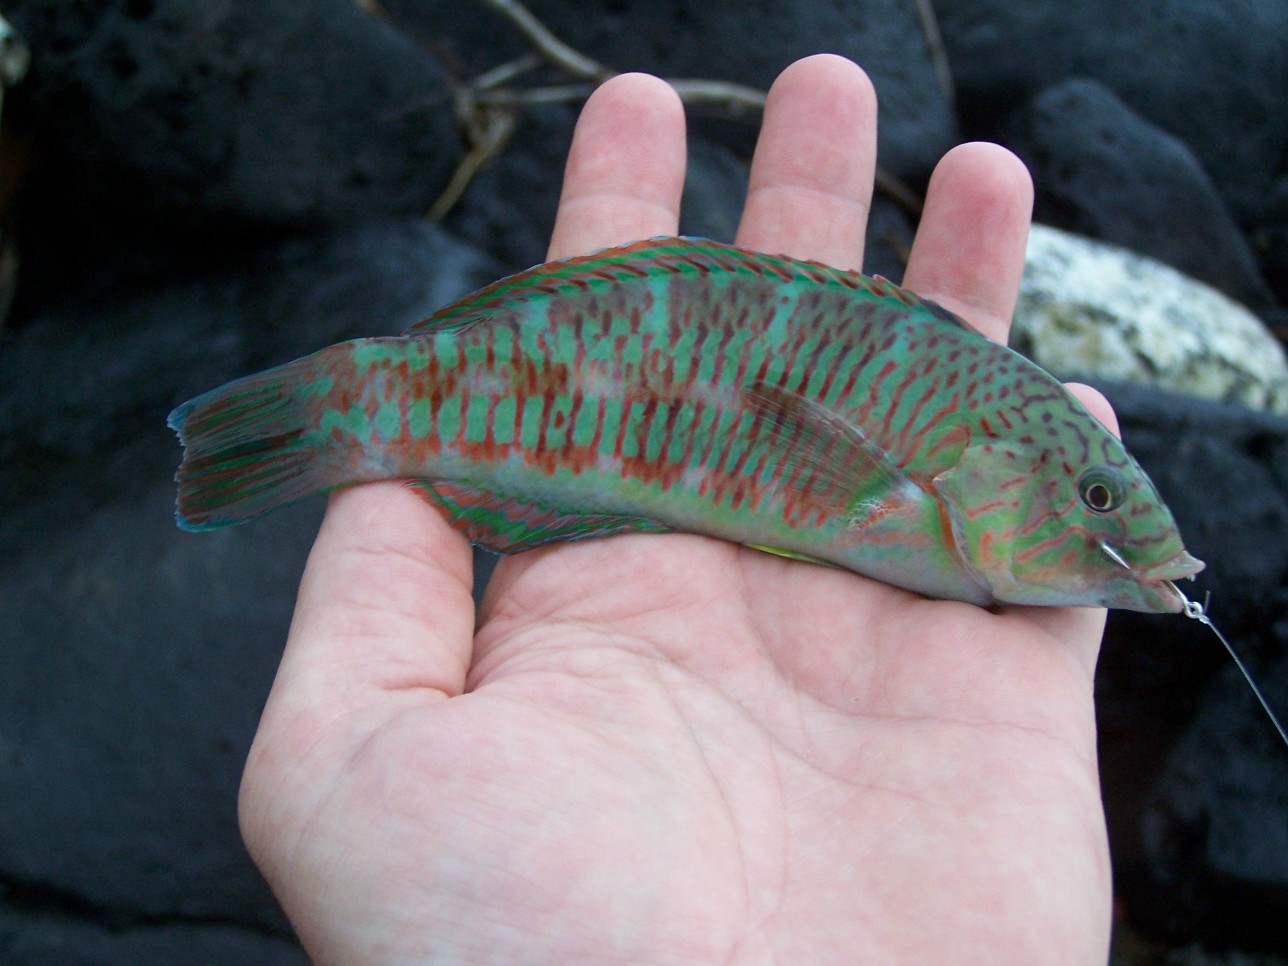
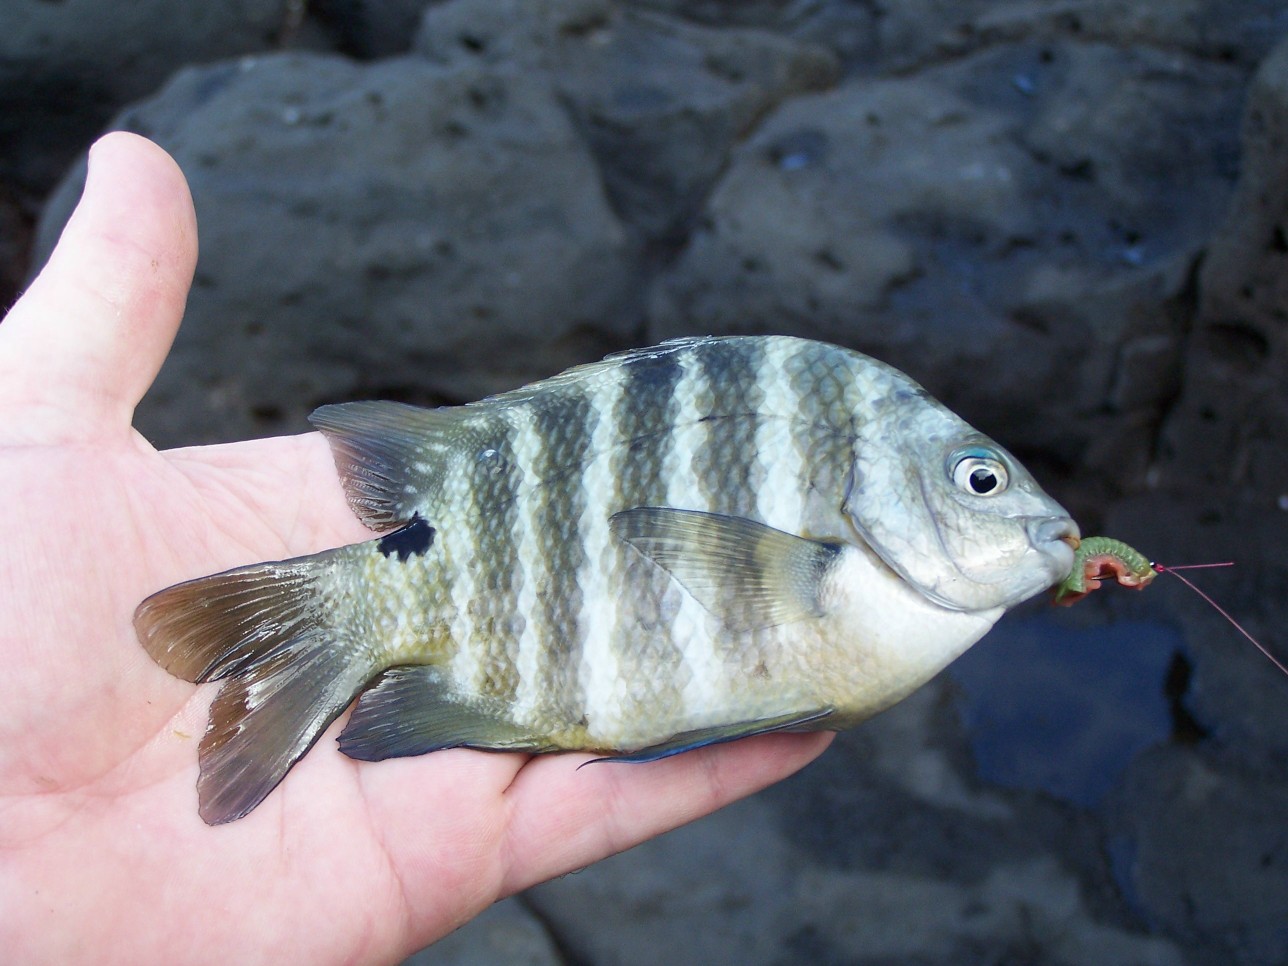
Just two of the many Wrasse that live in the Hawaiian Islands

SADDLE_WRASSE_KAUAI_FISH__01_09

SURGE_WRASSE_KAUAI_FISH_01_09

After taking my time and enjoying the warm water splashing over my feet it was time to move up the beach (about ½ mile walk) and fish the edge of Lydgate Park’s wading pool. The wading pool was built on sacred Hawaiian grounds as a place to relax and swim with a wave-protected rock enclosed wading pool.

I first dove here years ago and discovered the enormous number of surf fish that inhabit the cracks and crevices of it’s walls. The park is just a moderate walk from the condo and gives you a chance to see the island, beach comb and fish along the way.

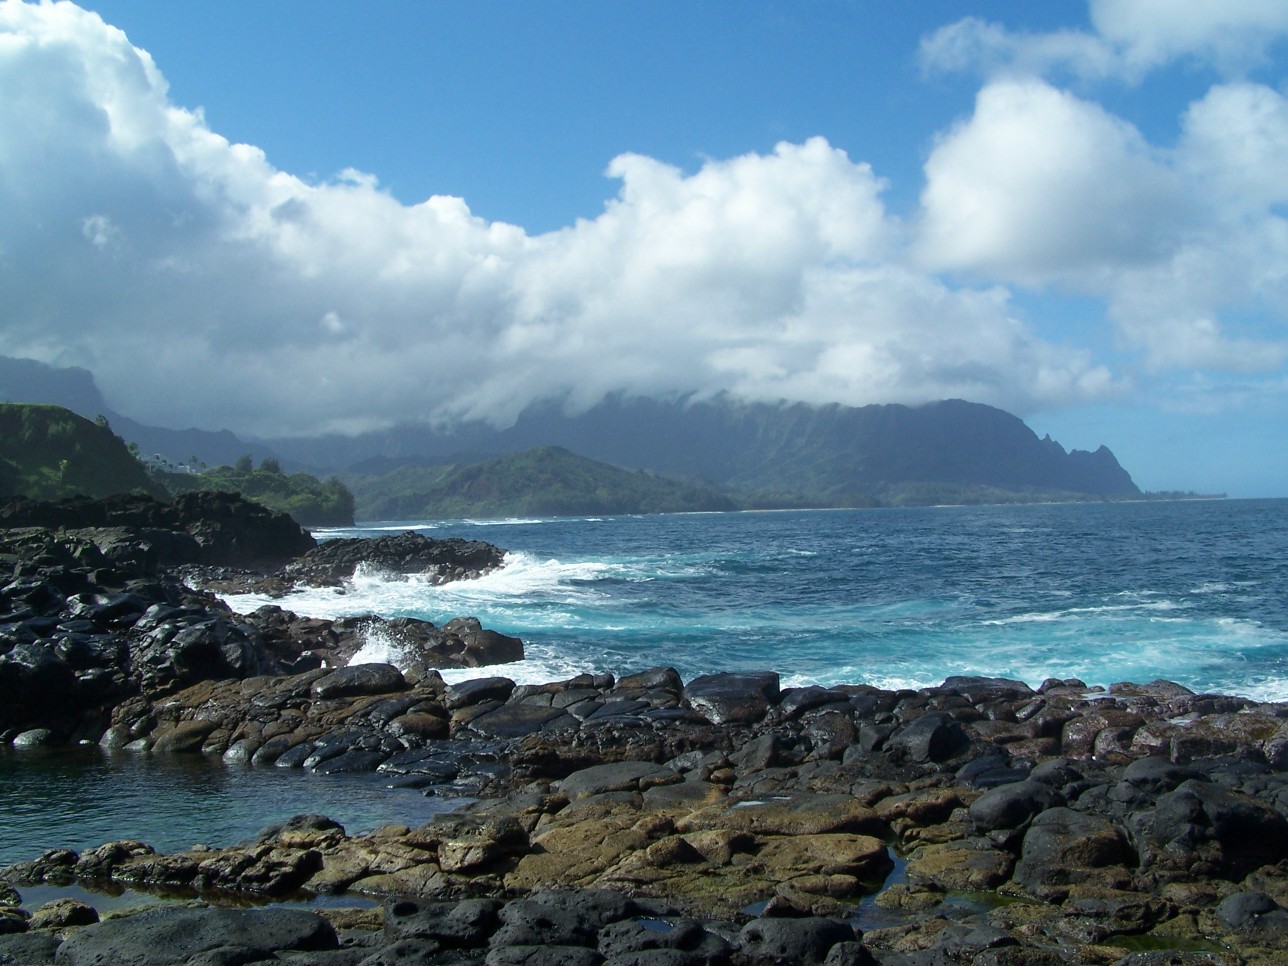
As the days of our trip extended into the next week we would venture up along the North coast of Kauai to see what new areas we could scout out. Our first stop was at Queen’s Bath near the resort town of Princeville.

On Kauai, Princeville boasts some of the most expensive real estate in the world along with a beautiful volcanic coast that’s perfect for fishing. That’s one great things about Hawaii. All beaches are public—so even in the most expensive neighborhoods everyone can have access to the ocean.

Once we reached the trailhead and parked it was time to gather up our belongings and make our way down one of Kauai’s notoriously muddy trails. As we slipped and slid our way down the trail it was hard not to notice the lush jungle and beautiful flowers. As we rounded the turn, just above the shore, a churning waterfall poured water over moss covered rocks and it was easy to see why this is considered paradise.

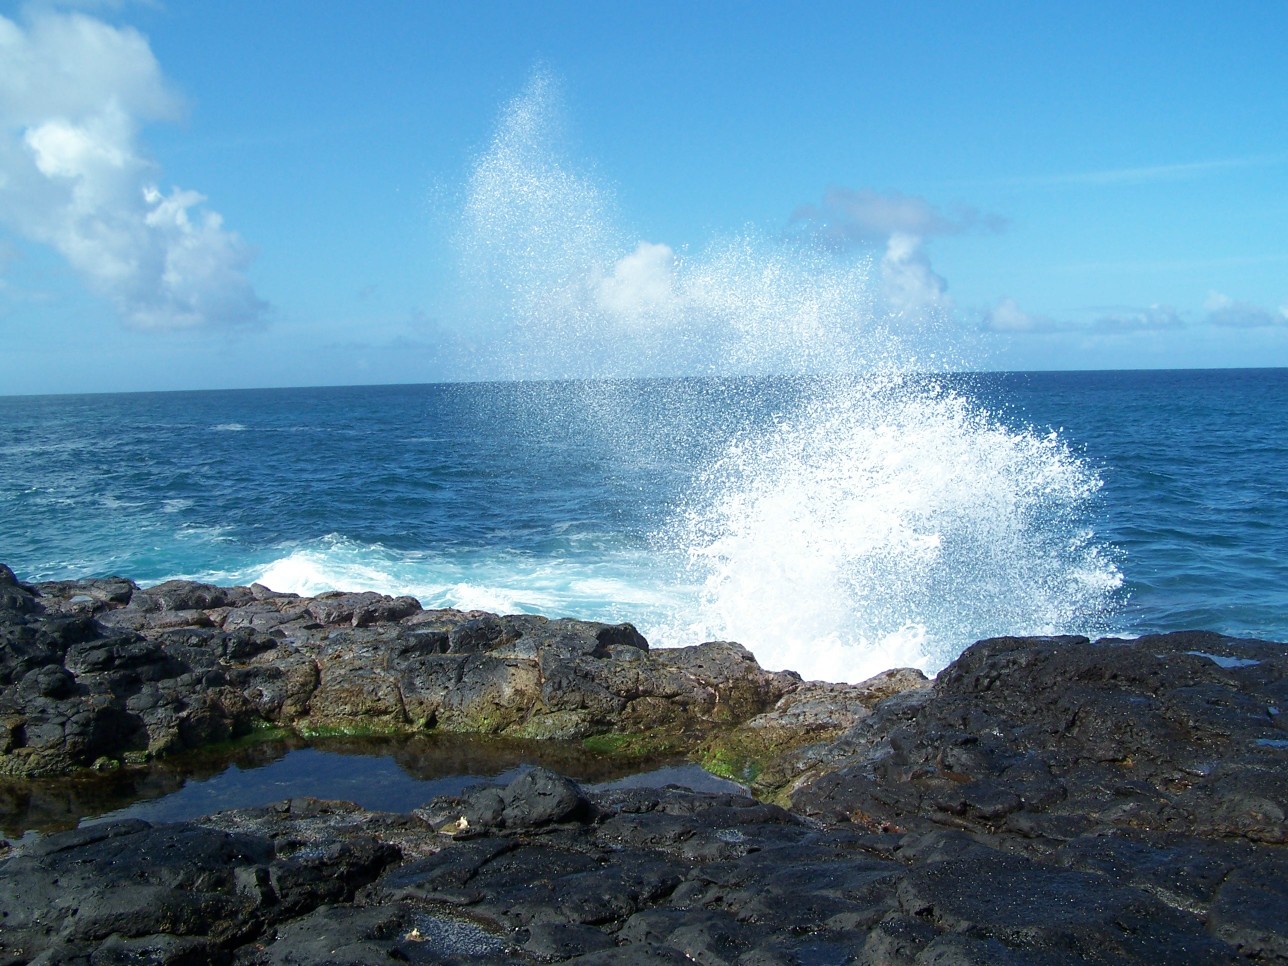
On the rocky shore we began to move north and look for the bath of Hawaiian queens. Just around the corner we found the first of several natural rock pools. After a short dip it was on to fishing.

QUEENS_BATH_09

QUEEN’S BATH NORTH SHORE KAUAI

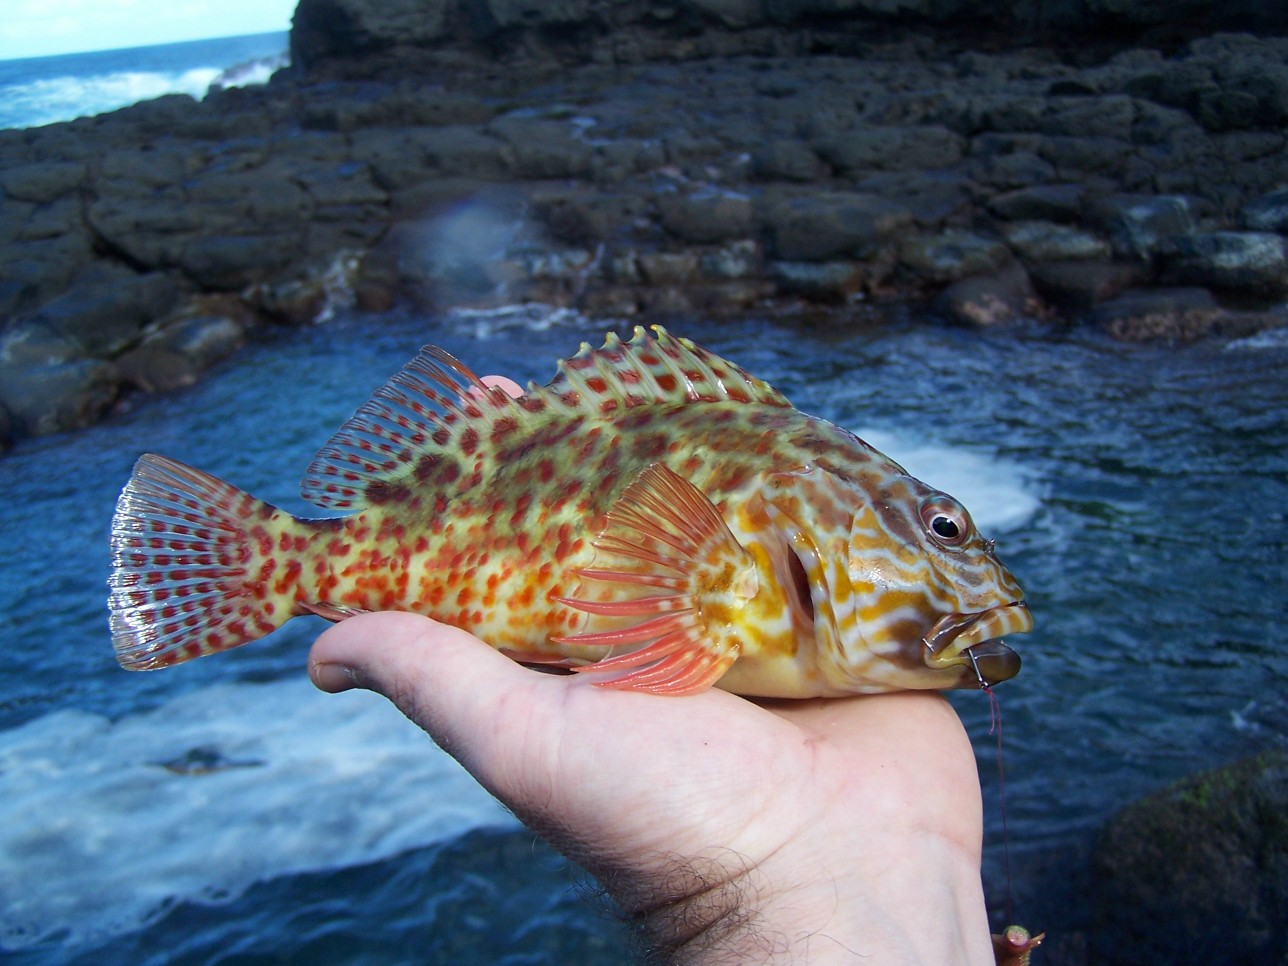
Using cut shrimp, octopus and Berkley’s Gulp! I cast out into the rushing water that crashed between the pillars of rock. It wasn’t long before my first fish was pulling line.

SPOTTED_CORAL_BLENNY_KAUAI_FISH_01_09

SPOTTED CORAL BLENNY

Before you knew it more and more fish jumped the line. Almost every cast a different variety of fish. I had to keep the I.D. book close at hand!

BLACKSPOT_SERGEANT_KAUAI_FISH_01_09

BLACK SPOT SERGEANT FISH

Over the next several days we fished many places on the island and discovered that we had just scratched the surface. I delighted in the realization that it would take many trips back to the islands to learn everything that just one local knows.

In Hawaii you have many different types of beaches to fish. You’ll find sand, rock and volcanic shores. I’ve found it’s a good idea to snorkel the area so you can pinpoint the areas to fish. Using light tackle is ok but size up your line and use fluorocarbon leader to reduce loss due to rock abrasion. Many fine baits can be found at the local supermarket so look there first.

Just like back on the mainland, the locals like to use the plastic grub to catch fish. But their presentation must be altered to avoid having every cast snagged. To reduce loosing gear, locals use a sliding bobber that can be cast out and retrieved along the reef. This system suspends the bait just above the bottom and entices fish to leave the relative safety of the rocks and strike.

Having come to the end of another trip to the Islands it’s sad to watch the last sunset sink into the sea. Each time I come here I learn something new—something that I can bring home and try.

One way of learning the tip’s you’ll need to be successful in Hawaii is by watching the locals fish the beach. Another way is to invest in a great DVD about fishing the islands called: Shore Fishing Hawaii by Brian Kimata. This video includes tips on all the techniques that work throughout the Hawaiian Islands. You’ll find it at: www.shorefishinghawaii.com

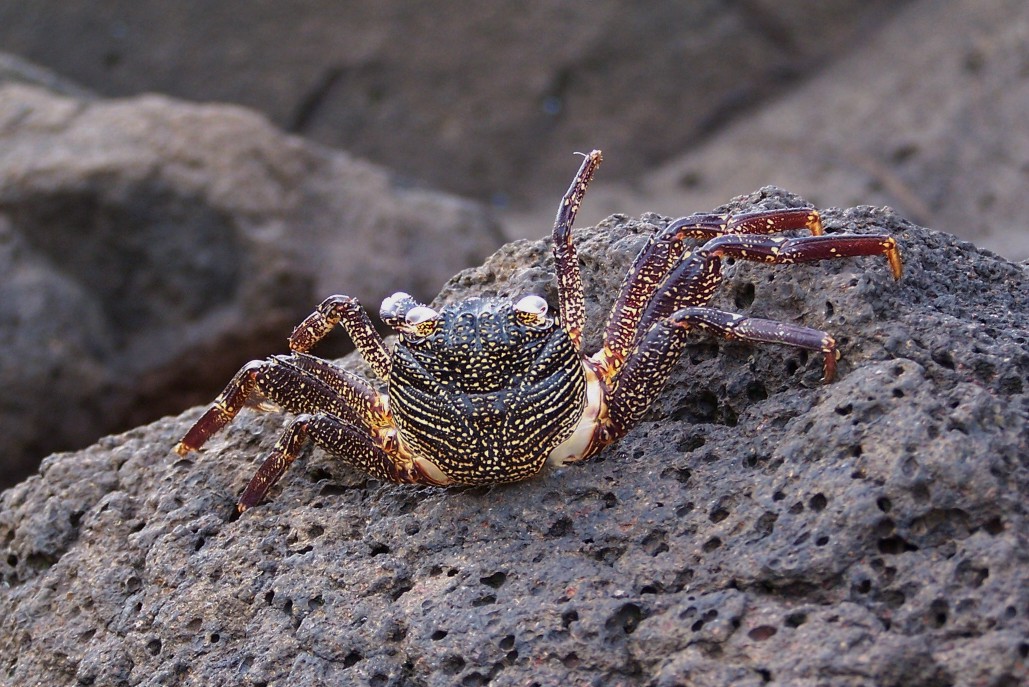
HAWAIIAN_ROCK_CRAB_01_09

SHORE CRAB

HAWAIIAN_FLAGTAIL_KAUAI_FISH_01_09

HAWAIIAN FLAGTAIL

Five Top Surf Baits for Free!!


Six Top Surf Baits

(You Can Collect for Free!!)

     There’s nothing better than live bait for catching surf fish. California’s beaches, estuaries and harbors are loaded with bait you can collect for free. All it takes is a little time, patience and the right tide to collect what you need for a great day of fishing.One of my favorite rules when it comes to surf fishing is: Look for the bait that occurs naturally around the area you are fishing. If there are crabs in the sand or sidewinders on the rocks you can be well assured that’s what the fish are eating. Take a few moments the next time you go down to the beach and pay attention to what occurs there naturally—that’s usually your best bet for catching surf fish.

SAND CRABS

BUNCH_O_SAND_CRABS

Some baits are available year-round, while others like the sand crab are seasonal and occur mainly in Southern California during spring, summer and early fall. When the local waters warm to around 60 degrees sand crabs will dig their way to the surface in search of food. As warm summer water bathes the beach the crabs grow and shed their shell. Much like a snake loses his skin, the crab also sheds and grows several shells throughout the summer.

My favorite time to collect crabs is at high tide. But crabs can be found in “beds” at low tide too. The two most common techniques for collecting crabs are digging by hand or using a galvanized sand rake.

I like to find an area near the high tide mark on the open sand beach and begin to dig there. When I dig by hand I search crabs within the first 6 inches and put them into a bucket for washing and sorting. If I use the crab rake I can pick out the best crabs and put them directly in my waist bait bucket and I’m ready to go.

For storing, I keep my sand crabs in a plastic container inside a small ice chest near a frozen bottle of water. They will live the longest in a 50-60 degree range so don’t put them in the refrigerator. Also, remember to place a piece of wet kelp you collected at the beach right on top of them. They will keep cool, moist and alive for about two days.

MUSSEL

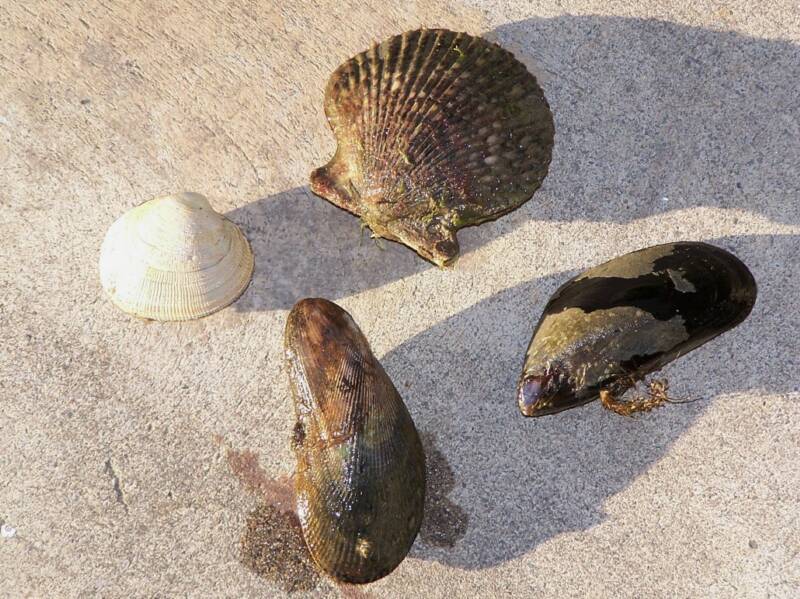
Mussel can be found where rocks and structure meet moving water. You’ll find two kinds of mussel in our local bays. On outer rock structure like jetties and breakwalls rock or piling mussels cling in clumps to rocks and structure. These mussels can be up to eight inches long and have orange and brown meat. They group is large numbers and many times completely cover their host. Mussel has always been known for driving perch crazy but when rigged using only the lip of the mussel it is deadly for halibut too. The best place to find mussels is on rock jetties, pier pilings and near harbor entrances.

ASSORTED_CLAM_AND_MUSSEL_08

In bays and estuaries green mussel attaches itself to rocks and structure in small groups. Most often they can be found attached to the bottom of rocks. Look for this mussel in back bay areas where the water movement and wave action is gentle. Turning over rocks is a good way to find them. Be sure to replace the rocks once you’ve look so more mussel will continue to grow. The meat on this mussel is bright green and seems to work both as a sight and taste incentive for fish to bite. Most green mussel is four inches or less in length.

When collecting mussel and other baits know the DFG rules and collect only what you need. On the Internet you can check here for the latest rules and regulations: http://www.dfg.ca.gov/marine/sportfishing_regs2008.asp
In most cases I use about 10 mussels each time I fish. If you place the mussel in a bucket overnight it will be easier to shuck the next day. If you seal the unopened mussel in a plastic container and refrigerate, it will last almost two weeks. I like to clean some extra mussel, put it in a small zip top bag and freeze it. That way next time you go fishing you bait is ready to go.

CLAMS

CLAMS_BIG_LITTLENECKS_12_08_op_800x600

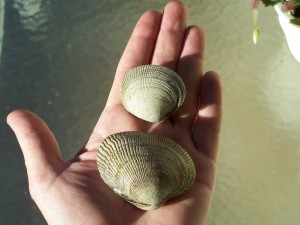
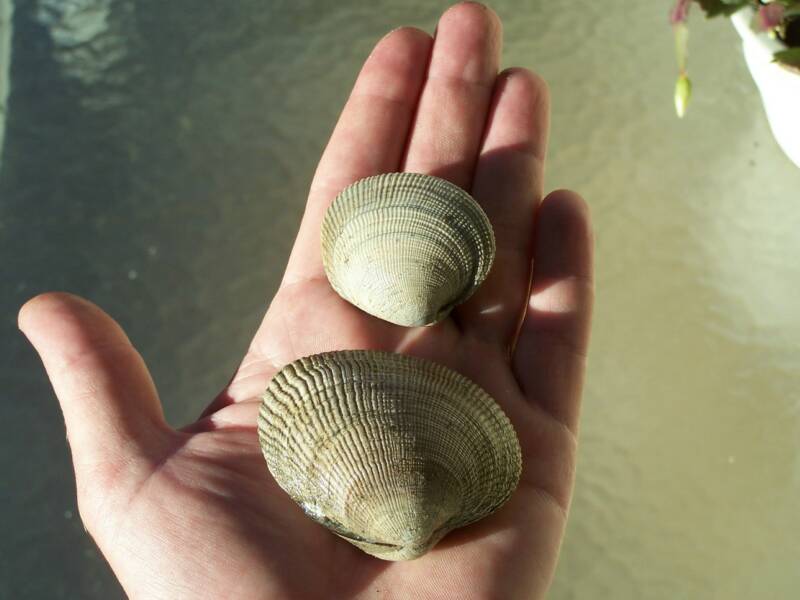
There are several types of clams found on California’s beaches including Pacific Littleneck, Gaper, Pacific Razor, Nuttall Cockle and Pismo clams. All of these clams make great bait but without question one of the most abundant and easiest to collect is the Littleneck.

Littleneck Clams are found in areas where sand and mud meet rocks and in calm bay areas like harbors and estuary inlets. Outside harbors where sandy areas meet rock, look for them to be buried in less than six inches of sand. They like to congregate in groups, buried in sand, adjacent to rocks. Look for holes in the sand that clams use for feeding and many times you’ll find them just beneath.

When you find clams smaller than the legal size always be sure to replant them in the sand. When searching for calms think about where rivers, creeks and estuaries meet the ocean. This is where you will find them most abundant.

Littlenecks are also found in back harbor areas under small stones adjacent to mud and sand. Look for rocky areas that have stones about the size of a shoebox. Try to find where sand or mud is near or under the rocks. Carefully, turn each rock over and look for them just below the rock on in the mud or sand beneath. Always be sure to put the rocks back as you found them, so that next time you go down to collect clams there will be even more!

I generally collect no more than 10 clams per person for each day of surf fishing. Like mussel, clams keep well in a sealed plastic container in the refrigerator, staying fresh for about two weeks. It’s a good idea to shuck clams the night before you go fishing. That way you’re not fumbling with your clams and a knife at the beach (“did anyone see my finger?”).

GHOST SHRIMP

ghost_shrim_

Ghost shrimp can be collected by hand or purchased at some tackle stores. Surf fishermen rave about how well ghost shrimp work. In fact, if you ask what type of fish they catch most might say they catch whichever fish gets to their bait first! Some of the biggest corbina and spotfin croaker I’ve ever seen were caught on a shrimp—seems to be an oxymoron but who cares if it works!

Ghost shrimp or yabbies, as they are called in Australia, can be found in estuaries and inside back harbor areas. Ghost shrimp burrow into mud areas and can be most effectively harvested with a shrimp plug at low tide. This device uses suction to pull a plug of mud from the bottom. You then push the mud plug out and search for ghost shrimp.

Ghost shrimp can be kept in a loosely sealed plastic container in the refrigerator for up to one week. It’s a good idea to collect a bottle of seawater from the beach and rinse the ghost shrimp with it daily.

SIDEWINDER ROCK CRABS

SIDEWINDER_CRABS_07

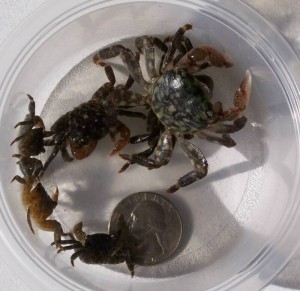
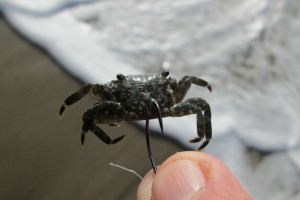
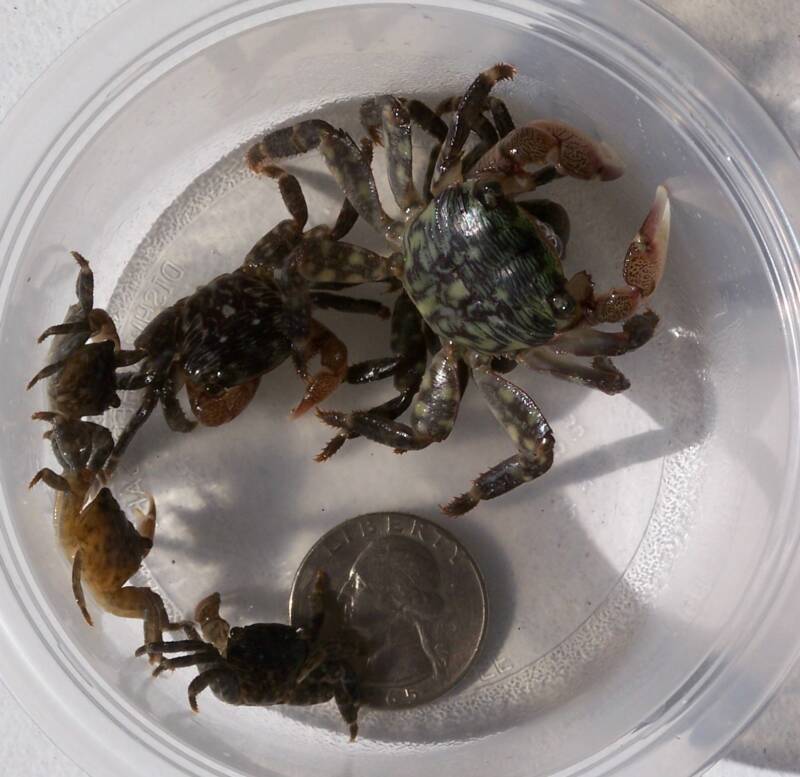
Sidewinder rock crabs make great bait for perch and croaker and seem to work best when used near rocky areas. You will see these crabs in large numbers scurrying back and forth on local rock jetties. They are brown and green in color and possess two large (and sometimes painful!) claws. They generally live between rocks in nooks, crannies and crevices.

The best place to find sidewinders is just above the waterline on rock jetties and tide pool areas. Look for them between mussel clusters, in crevices between rocks and by flipping over small rocks. Sidewinders can be found at both high and low tide and seem to be easiest to see and catch on overcast and cloudy days. I generally catch them by hand but you can also put a small piece of anchovy, cat food, mussel, etc. in a can, place it between the rocks, tilt it on its side and come back later to see what you’ve caught.

Sidewinder crabs are very hardy bait and can be kept for a week or longer. Place sidewinders in a plastic tub with a large piece of kelp to keep them cool and moist. I usually drape a towel or newspaper over the container to keep light (and our cat!) out. Sidewinders, like sand crabs, should not be kept in the refrigerator.

SAND WORMS

SAND_WORMS_01_08_op_800x600

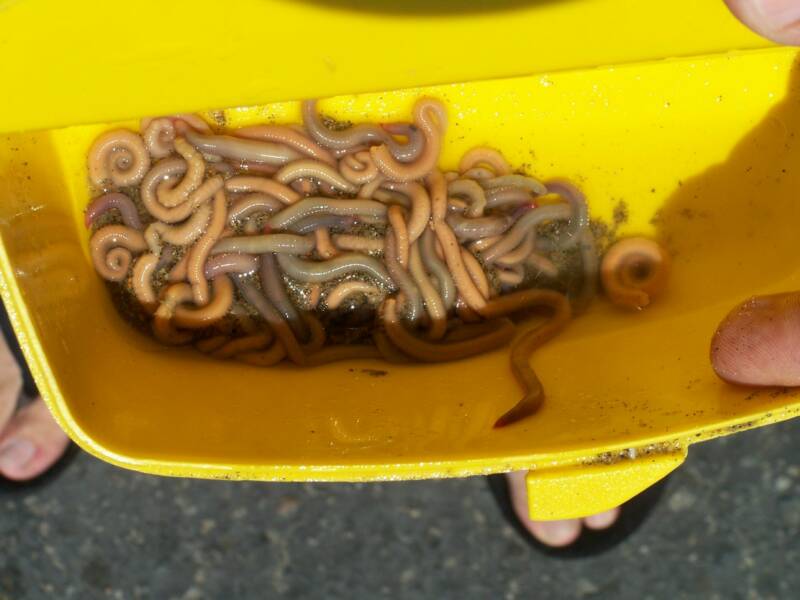
Sand worms live beneath the sand and make great surf bait. Fresh worms work well for perch, croaker and an occasional halibut. These worms can be found at the beach throughout the year but are most active during spring and summer grunion runs. Their color takes on what they have eaten. Many times they are an olive green and orange from eating clams and other times they may be red and green from eating grunion eggs.

When looking for worms at low tide start by digging ten to twenty feet below the high tide mark. Most worms are down about 12”-36” and occasionally can be found in groups. Begin by digging a hole three feet wide and one foot deep.

Look for the worms as you dig. Remember they can climb away fast so keep a close eye. Catching worms takes a bit of practice–because they can dig away from you at a slithering fast pace. Start by grabbing the worm as it digs away. You may dig around it to catch the worm or pull it slowly backwards until it lets loose and comes out.

Worms are very hardy and easy to keep. Simply place them in sealed plastic container and put the in the refrigerator. They will bunch up and stay lively for about a week. I like to use a #2 split shot hook and thread one or two worms up the hook for bait.

Spending a little time collecting bait at your local beach can really pay off. Even when fishing with artificial baits it’s important to know what fish are eating. That way you can match your baits to the colors and size of what fish eat everyday. Not only is it fun to find, collect, rig and fish natural baits but with so many things that cost money today it’s still nice there’s something out there that’s still free!

Surf Fishing for California Halibut


Surf Fishing Techniques
For California Halibut
By Bill Varney
Photo Contributors Arthur Lai, Andre Weckstrom

I’m asked all the time what is the best tasting fish from the surf. Well the truth is, I release all of my fish back into the water with one exception—the occasional legal halibut. And it seems like I’m not alone.1_13_07_HB_PIER
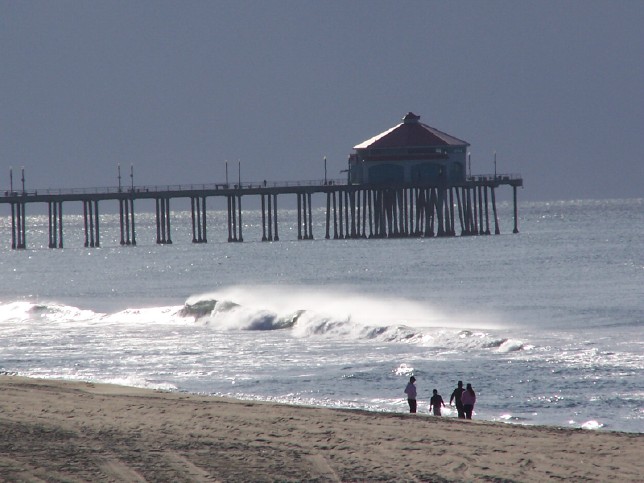
California Fish and Game Department has stepped up their monitoring of halibut fishing this year in response to concerns about over fishing–All the result of so many anglers turning to halibut because of the closure of salmon fishing along the West Coast. Fortunately, halibut fishing has been exceptional this year from San Francisco Bay to the Mexican border with many three fish limits the rule.
OLYMPUS DIGITAL CAMERA

A non-migratory fish, the California halibut grows to over 60 pounds. The state record 58lb 9oz halibut was caught at Santa Rosa Island. These fish live in a depth range between 2 and 100 feet. In the winter most halibut swim into deeper water to feed and prepare for winter storms. In the spring, summer and fall halibut come into much shallower water in both the surf and just offshore, to feed and spawn. A “legal” halibut is one measuring over 22 inches and is considered one of the most sought after catches in the surf.

Best Places to Find Halibut

Boat fishermen love to target halibut but fishing for them from the surf is also productive. Some of my favorite places to fish for halibut are along the open beach, around jetties and near estuaries and river mouths.

Open beaches offer a challenge when looking to target halibut. When you reach the beach find a high spot near the water’s edge and look up and down the beach for signs of fish. Because surf fish congregate near areas of jumbled or foaming water look for small rip tides that form just off shore. Another area to target is offshore structure including holes, kelp beds and reefs. Once you spot these areas, cast your bait or lure along the edge of a rip tide, structure or where rocks meet sand–this is where fish will be waiting to ambush bait.

Halibut also congregate in the offshore troughs that are built just below the waves. These troughs are easiest to find at low tide and run parallel to the beach. One trough will form outside where the waves break farthest out from the beach, another trough will form where the waves break (during high tide) near the shore. Cast over and drag your bait across these troughs to entice halibut to bite.

Open beaches that have a rocky point adjacent to them are also great areas to target fish. Find where the sand meets the rocks and fish along this area. Halibut commonly lie-in-wait along these edges
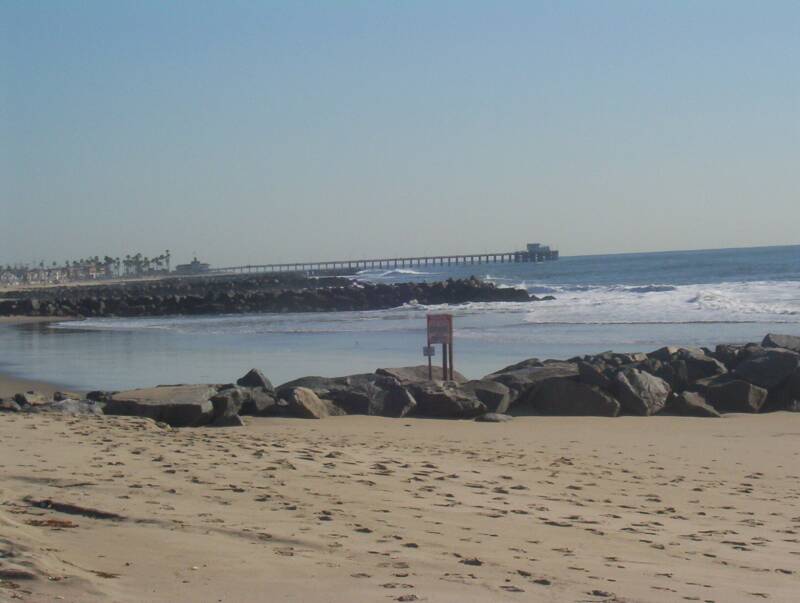
JETTIES_op_800x603

Jetties also offer some great opportunities to catch halibut. The California coast is littered with man made and natural jetties that provide structure and habitat for halibut. As with open-beach fishing, it’s always smart to cast along the edge of rock where it meets sand to find the fish. But there are some subtle differences to also look for when fishing along a jetty.

When approaching the base of the jetty, where it meets the sand, look out to sea and make note of the direction of approaching waves and swells. If the waves are approaching the jetty from the right, a natural eddy will be generated on the jetty’s opposite side (left side). If waves are coming from the left, an eddy will form on the jetty’s right side.

Eddys are much like a rip tide and are characterized by swirling, foaming off-colored water. Fish congregate in an eddy where moving water churns up bait and allows them to stay hidden while they wait to ambush food. Once you find the eddy, fish along its edges and cast through the middle to find the fish. Don’t be surprised when the tide or swell direction changes and the opposite side of the jetty becomes the best place to fish.
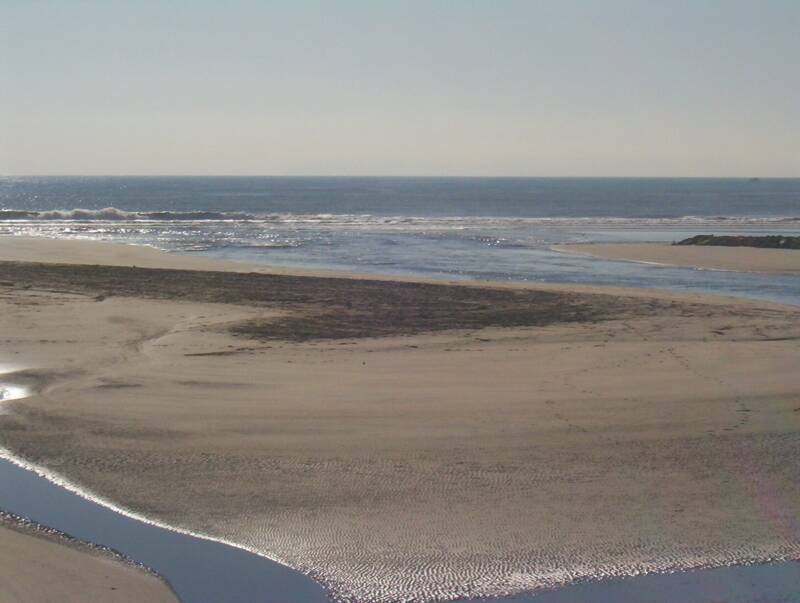
RIVERMOUTH_op_800x603_op_800x603

Estuaries and river mouths are almost always connected as a way for fish to run from warmer breeding grounds out into open-ocean. The California coast was once littered with hundreds of natural estuaries that acted as rockeries for growing fish stocks. After unprecedented development and growth many of these breeding grounds were filled or closed off to ocean circulation. Still there remain a few in almost every beach community that offer fantastic surf fishing.

When approaching an estuary and river mouth area use the same rule of observation as with jetties—determine the direction of the swell and current and how it effects water movement. Unlike with jetties, tide flow will have a much bigger effect on fishing the river mouth. A high going to a low tide will pull water out of the estuary and toward the open ocean. A low going to a high tide will push water and waves up into the estuary and change the direction and movement of fish.

Again, look for the formation of eddys. On an upcoming tide, an eddy may form just inside the river mouth. As tides recede, an eddy may form just outside the river mouth in an area of open-ocean. This is where the fish will congregate to lay in wait for your bait. Fish your bait along this edge and allow it to be pulled by the tide and current into the strike zone. Try to stay away from areas where the water is moving quickly as fish here will not be able to catch up with your bait.

The best way to become familiar with good fishing areas is by looking up your favorite strip of coast at: http://earth.google.com/ and mapping out a strategy for fishing. At this site you’ll be able to zoom into any coastline on the planet and find the best spots to fish. Look for areas where jetties and river mouths meet the beach. You can also find areas where there are large inshore holes or sand bars, points, kelp and reefs. Take some time to research your areas and you’ll have a lot more luck with a lot less gas!

Time and Tide

Each beach will have it’s own special time where fishing is best but here’s a general guideline that you can follow. When fishing the open beach, halibut fishing seems to be best at or near low tide. Lower tides give you the advantage to wade into the surf and cast well beyond the surf line. Low tides also allow you to reach the outside holes and structure that hold fish. Although some spots do fish well at high tide, our best luck on the open beach has come at peak low minus tides.

Near jetties I’ve found the best tides to be medium to high tide where the halibut come in close to the rocks to feed and spawn. Watch for high and low astronomical tides (the greatest swings in tidal movement because of moon phase), which move more water and create a larger or smaller eddy circulation. These tides improve jetty fishing and really stir the water up for halibut. If fishing the rocks at low tide, try using the jetty as a platform for casting to areas outside the rocks that don’t usually get fished.

Estuaries that are connected to the open ocean by a series of jetties or a river have always been very productive. Because fish use these river inlets to enter and exit the estuary there is no better place to target big fish. Strong currents during incoming and outgoing tidal flows sometimes makes it almost impossible to fish for halibut in these rivers.

That’s why fishing just minutes before, during and after low tide and high tide will give you your best chance at catching a keeper. During these slack tide periods your bait is presented in a more natural manner and the halibut, a lazy fish by nature, will have a better chance to attack your bait.

One more tip: The best time to fish for halibut is just after the grunion run. As grunion come ashore so do halibut to feed. A good run holds halibut near shore for up to two weeks as they search for bait, spawn and digest what they have found.

You’ll find a tide graph in real-time and a schedule of grunion runs at www.fishthesurf.com.
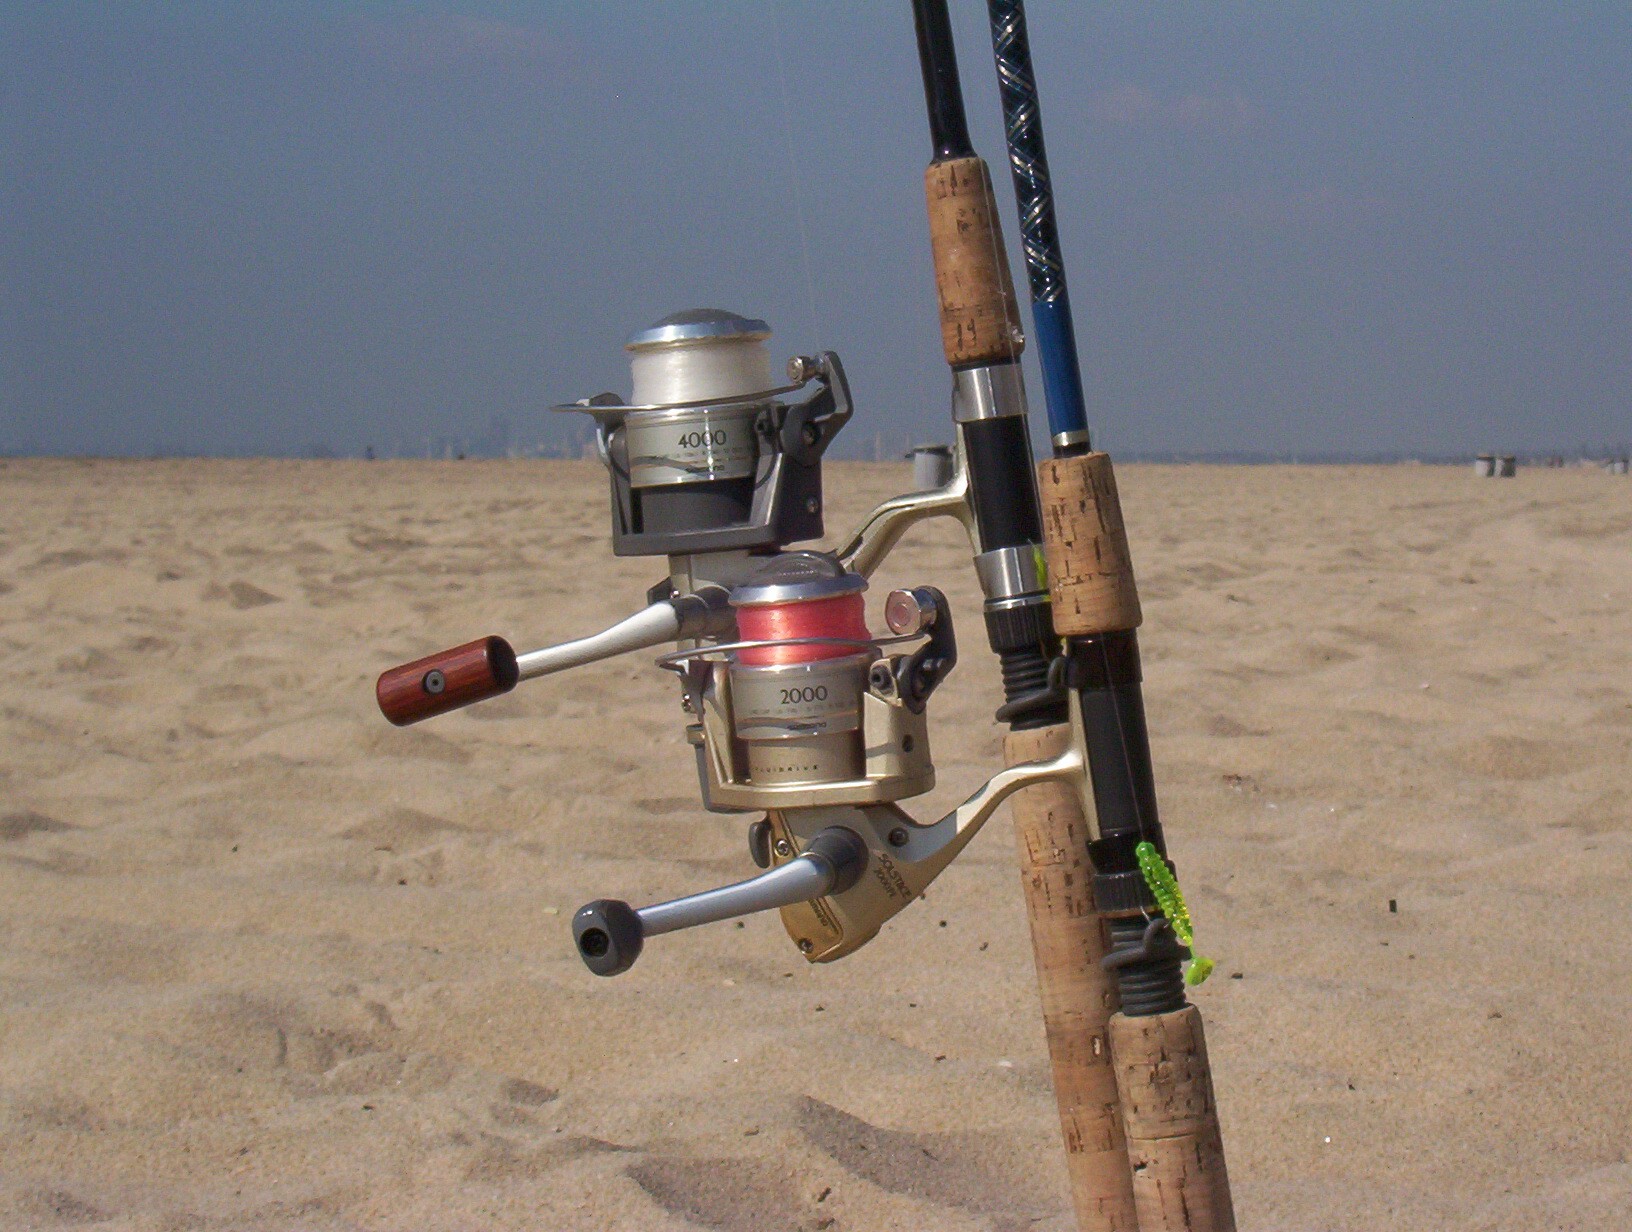
REELS

DRE_HALIBUT_06_26_08

Tackle

When it comes to tackle you have a couple of different choices of rod and reel combinations depending on whether you will be using live bait or lures.

For fishing lures it’s good to get started with an 8’ rod rated for 8-16lb line. Spinning and conventional reels both work well. For lure fishing, I prefer a conventional reel because it seems better matched to my rod when it comes to fighting the fish and directing it away from snags. There are many good conventional reels on the market so just make sure you have a smooth casting reel with at least 300 yards of 8-12lb line.

Conversely, when it comes to live bait I like to use a spinning reel because it seems easier to cast with a set up that includes a long leader and sinker. Once again I like to use a longer 7-9’ rod rated 8-16lb test and a 3000 size-spinning reel rated for 300 yards of 8lb test monofilament. I also recommend a spinning outfit for lures when you’re fishing in a tight area like under a bridge or near a pier or anywhere else your casting may be restricted.

Rigging

When it comes to halibut rigging I use two basic setups. The first is the Carolina rig which works best with bait (and also has some lure applications). The second rig is a lure tied directly to my monofilament mainline.

Carolina rigging consists of a sliding egg sinker, bead, swivel, 18”-36” leader and a hook. In small surf a ½ ounce egg sinker works well. In bigger surf or when fishing in the wind use a 1-ounce or heavier sinker to keep your bait on the bottom.
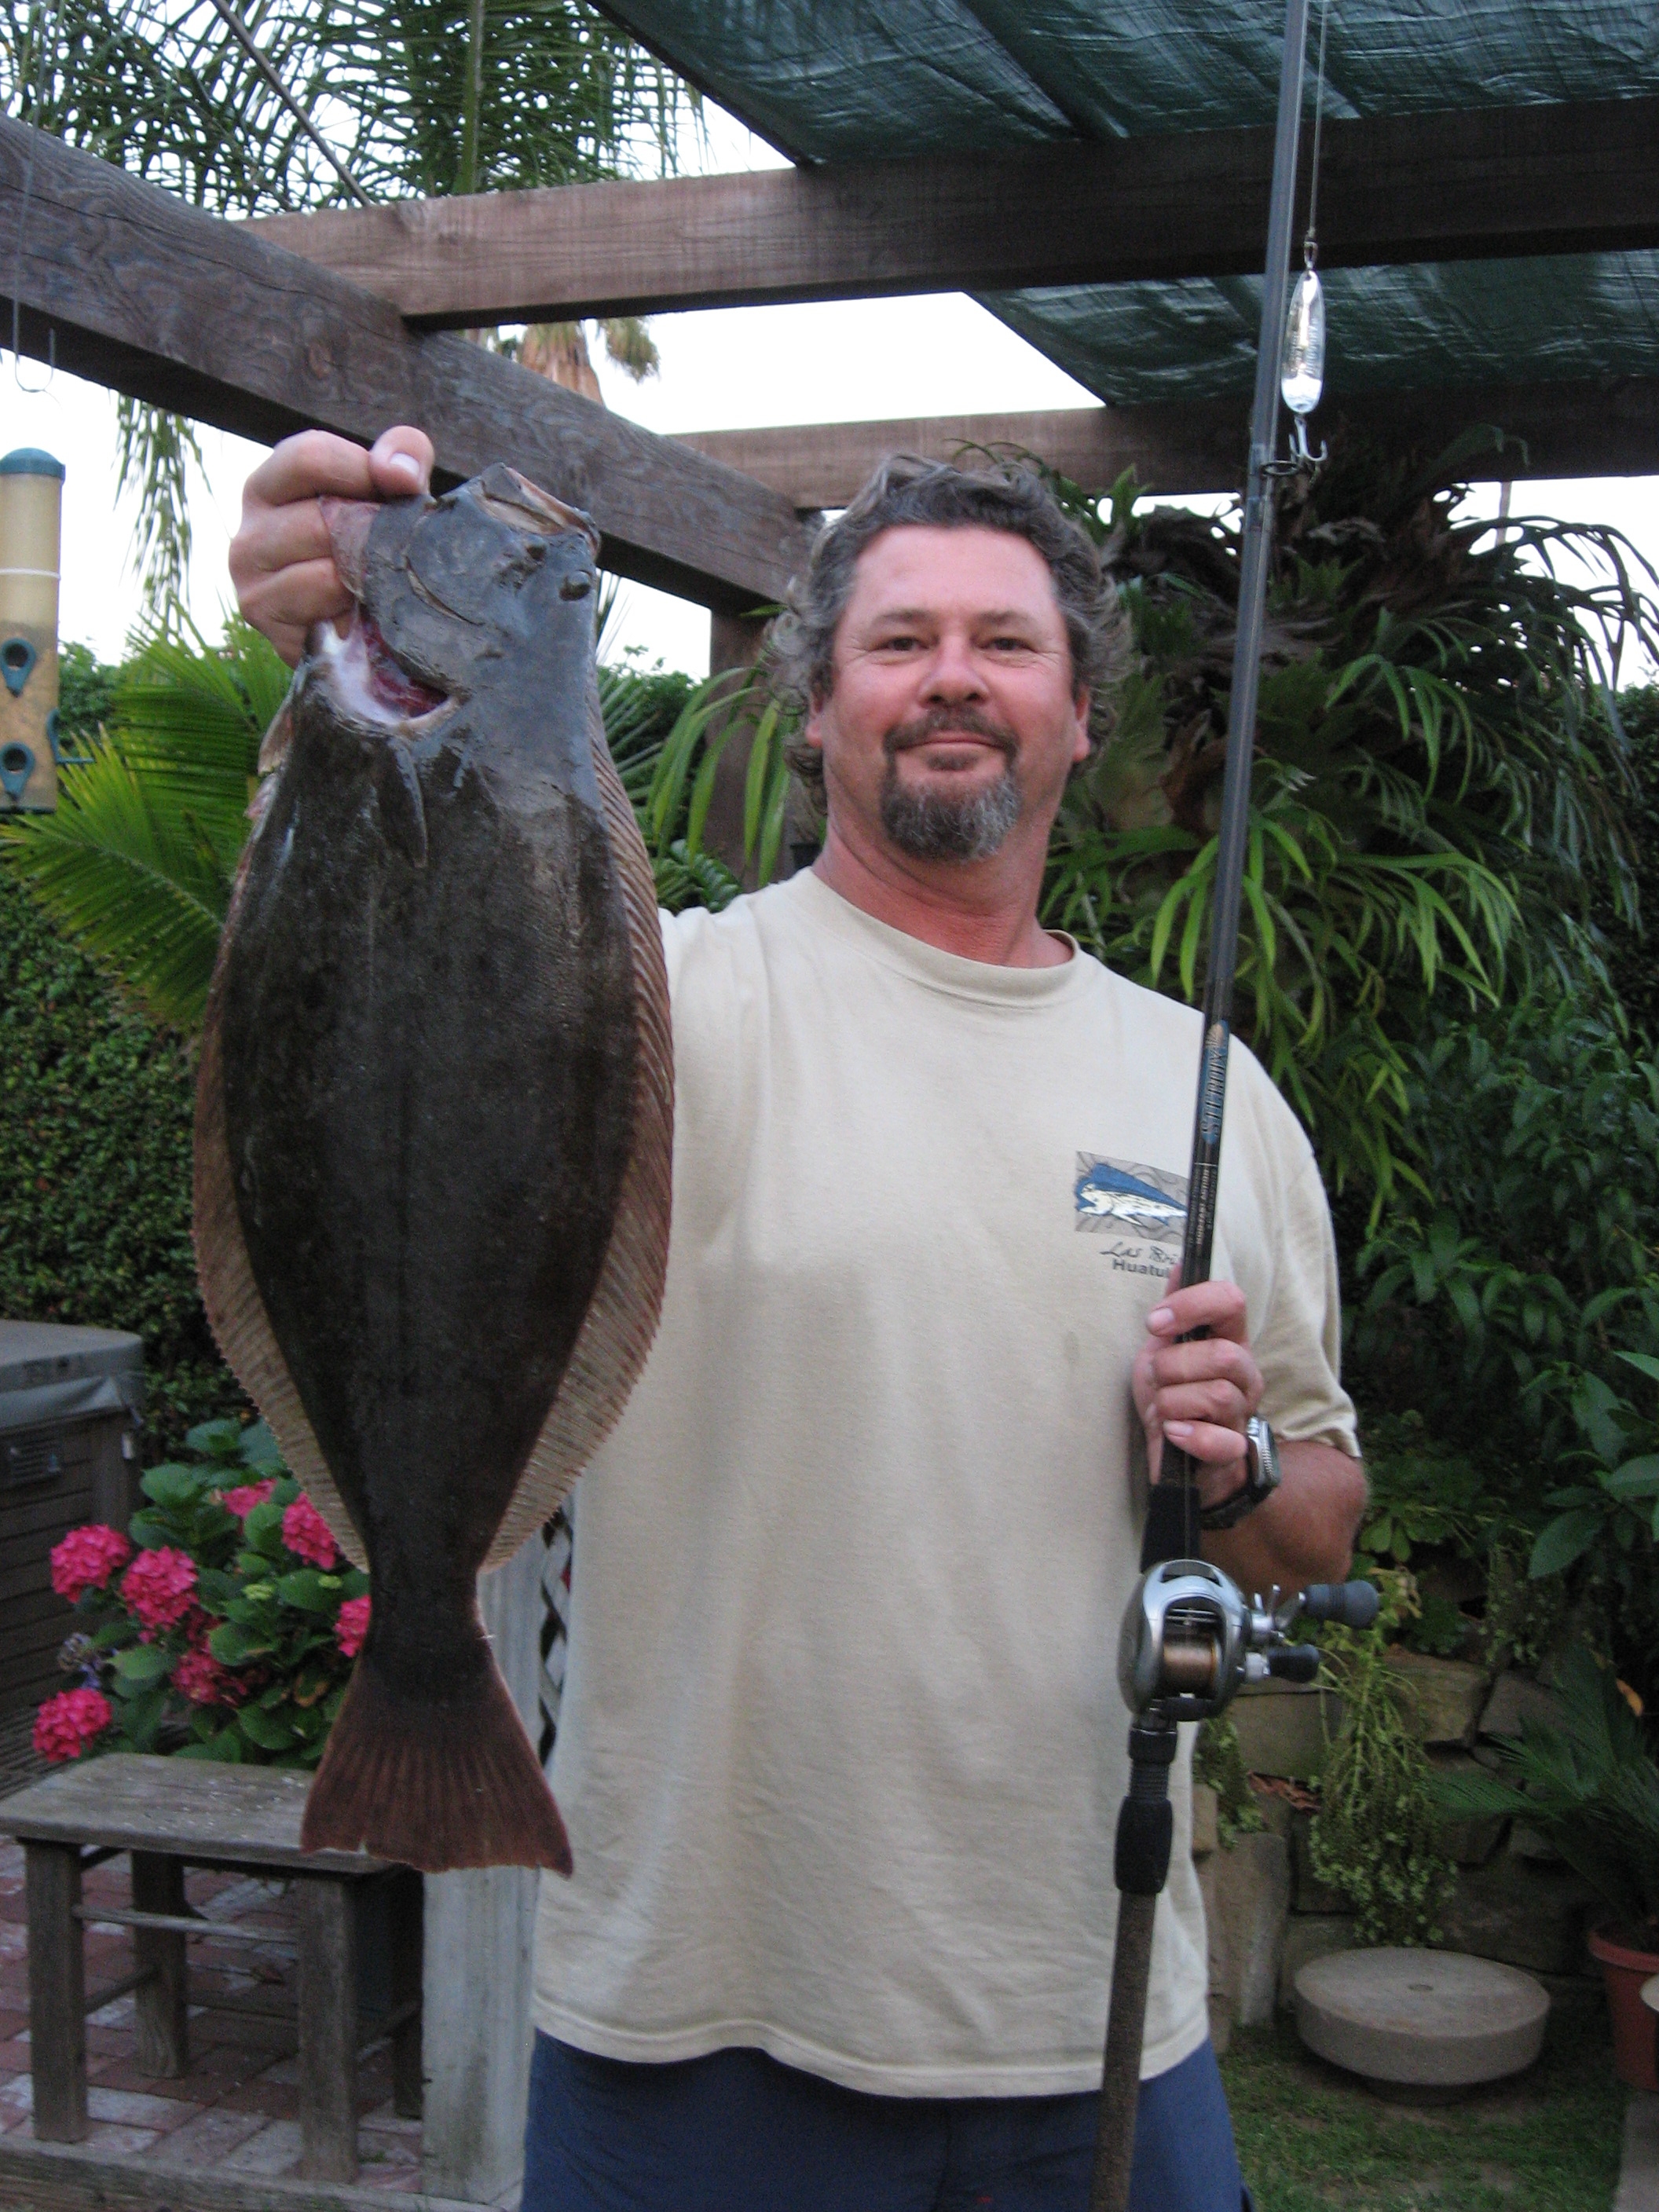
HALIBUT_SB_DRE_06_27_08

I like to use a black swivel, a clear bead and a fluorocarbon leader. In small surf my leader may be as long as 36”. In large surf always use a shorter leader (12”-18) to be sure your bait stays in contact with the bottom.

The hook I like to tie to the end of my leader is a conventional “j” hook, which is very sharp and made of thin black wire. The most important part of the rig is the hook so be sure your hooks are new, in good condition and very sharp. Some good hook choices include split shot, mosquito and octopus hooks in sizes 1, 2 and 4.

The Carolina rig work best with all live and fresh dead baits and also with a fly tied to the end of the leader in place of a hook.

The second setup I use when fishing with lures is either a straight connection of the lure to my mono or using a uni to uni knot to connect my main line to 10lb fluorocarbon leader and then tying on my lure.

Fluorocarbon leader is a good idea whenever I’m fishing near rocks or over structure. Fluorocarbon allows me to use a heavier leader and it’s much more abrasion resistant than monofilament.

So in open beach areas I’ll tie directly to mono; while in rocky areas like jettys and reefs, I’ll always use the fluorocarbon leader because of its abrasion resistant qualities.

Lures and Bait

When it comes to lures and bait fishing for halibut the options are almost endless. It seems that almost everyday I see someone on the Internet or an email that lets me know that something we never thought would work is working. As a testament to this, over the last two years there has been a great crossover of freshwater lures, especially bass lures, which work well in the surf.

Baits that Crank

Without question the most productive surf lures have been both Lucky Craft LC 110 (now FM 110) Sardines and Rapalla SXR-10 Slash Baits. These lures are best cast out and retrieved with a stop and go motion. They should be tied straight to your main line or onto a short uni to uni connected fluorocarbon leader. Most halibut move slowly so a fast retrieve may pass the fish by. A fish attractant applied to your lures will also help to attract fish and make them hold on once they bite.
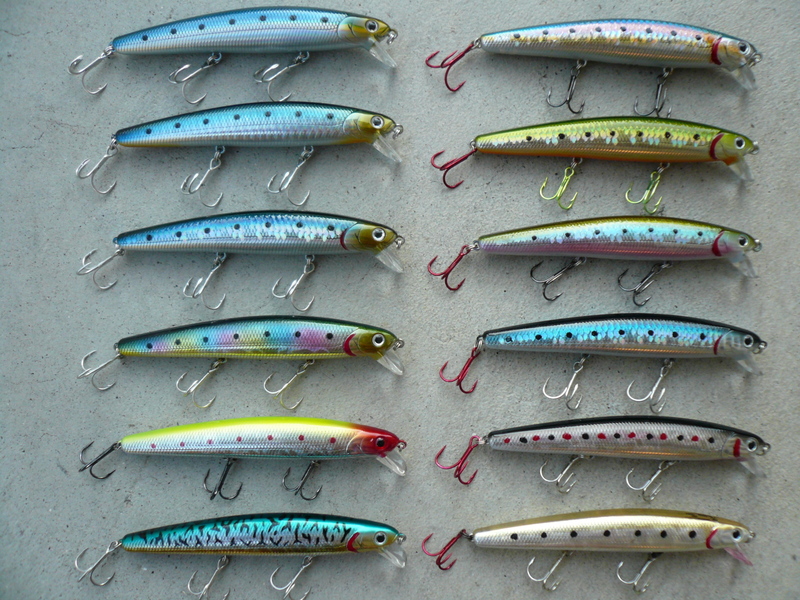
ARTHUR_LUCKY_CRAFT

I suggest that you wash these lures in fresh water after each trip to the beach. When you see dull hook tips and rust replace the treble hooks.
Both of these lures seem to work best and look most natural during slack tides when you can use a stop and go motion and the lure is not fighting the current.

Spoons

The two most effective spoons for the surf have always been Luhr-Jensen’s silver Krocadile and the Acme Kastmaster. These lures are easy to use and should be tied directly to your line. A good size to use is one between 5/8oz and 1oz.
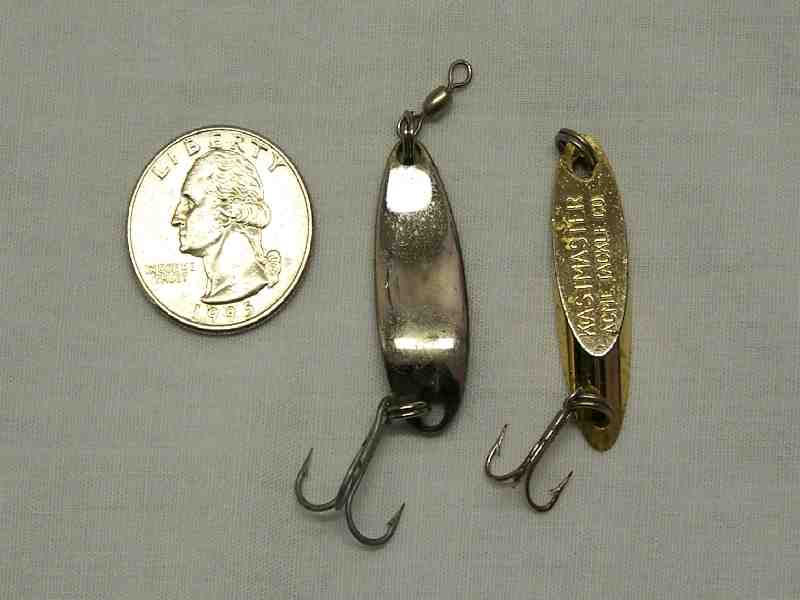
SURF_LURES

A long fan casting pattern and a slow retrieve, with the lure bouncing across the bottom, seems the most effective presentation. Fishing spoon lures at peak low tide will allow you to cast outside the surf line to offshore structure and holes. Or, fish these lures at high tide and you can concentrate on the inshore trough where halibut hunt for food.

Plastics

Grubs and plastic lures also work great in both the open beach and near rocks for halibut. Two styles of plastics seem to work best in the surf.
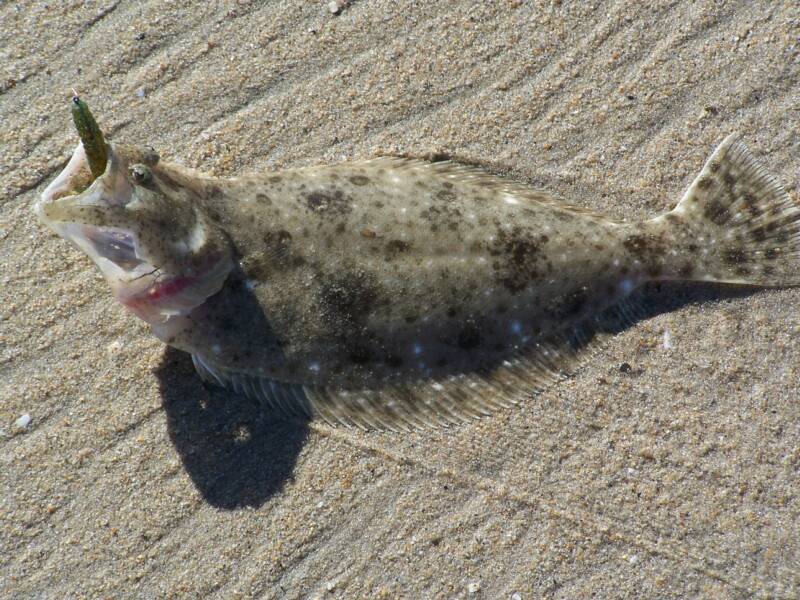
10_20_06_FLATFISH_op_800x600

The first, known as a grub, is in the shape of a pollywog. Most grubs in the 1 ½” to 3” range seem to work best. Attach grubs to you line using the Carolina Rig. Be sure to use a short leader in big surf and a longer leader in small surf. Grubs work best when cast out in a fan pattern and retrieved slowly, using stop and go motion, across the bottom. Be sure to use enough weight, as directed by the surf, surge and wind, to keep your bait in constant contact with the bottom. Always remember to use a sharp thin wire hook.

Unlike the grub, plastic swim baits can be tied directly to your mainline. Use a leadhead that matches the size of your bait and the current you will be fishing in. Once again remember to keep your bait in contact with the bottom and don’t be shy from dunking your plastics in “hot sauce” to attract and catch more fish.

The best colors for finding halibut have been the colors that reflect what the fish have been eating. Sardine, anchovy, green, brown and oranges have always worked along with stark white that probably resembles squid that halibut scoop up from the bottom.

Twitch Baits

Twitch baits are made of the same material as plastic baits but require different rigging. These baits are a true crossover from fresh water bass fishing and have become very effective when used in the surf for halibut. Look in your local tackle shop for Basstrix and Sluggo products.

Rig the twitch bait with either a small 1/8th leadhead (or the new Mustad “Power Lock” weighted hook) and tie it directly to your line. You may also rig it using the drop shot method.

The drop shot rig is simply a sinker on the very bottom of your line and a loop 12” – 24” up your line for the hook and bait. When using the drop shot rig, don’t tie the lure directly to your loop. Run the line through the hook’s eye and allow the lure to slide freely on the loop in your line. This will give the bait a much more natural look and help you to entice more fish to bite.

Twitch baits work best when they are cast out and retrieved slowly using stop and go then twitch motion. When using the drop shot rig try to find the lightest sinker you can use and still stay on the bottom. This will help to reduce the number of snags and tangles in the rocks. Look for lure colors that reflect what the fish are eating and fell free to use the “hot sauce” on these baits too.

Surf Fly

Fly-fishing has always been productive in the surf. But the skill, equipment and work needed to be productive using a fly outfit has kept most anglers from picking up the fly rod and heading down to the sand.

By using a fly presented on the Carolina Rig it is easy to use both spinning and conventional reels. The most effective surf fly is the Clauser minnow which mimics a small grunion or smelt in the surf.
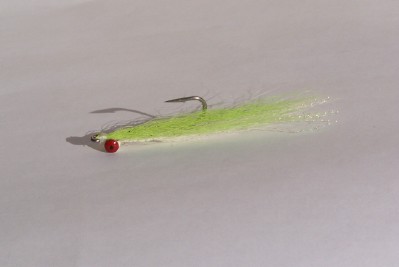
CLOUSER_CHARTREUSE_AND_WHITE_FLY

Lime, olive green and chartreuse with white have always been productive colors. Apply “hot sauce” to the fly and fan cast the bait past the surf line. Using a slow retrieval, pull the fly across the bottom in areas near structure and rocky out croppings.

Live Baits in the Surf

There are many types of live bait locally available for use when targeting halibut in the surf. Live, fresh dead or unfrozen sardine, anchovy, smelt and grunion all work well in the surf. Additionally, strip mussel lip, threaded on the hook like a worm, is natural bait for halibut and also seems to work well when the bite is tough.
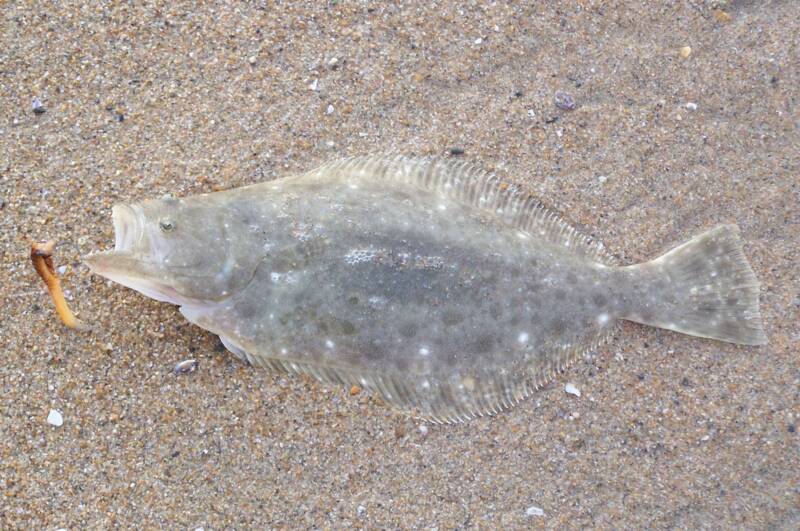
HALIBUT_CAL_2_op_800x531

Use either a spinning or conventional outfit and the Carolina Rig. I like to hook my baits (anchovy, sardine, smelt, grunion) through the bottom and top lip with my hook to be sure they swim correctly and give the most natural presentation. Fishing with natural baits requires a much slower retrieval and periods of stop and start that allow the lazy halibut to catch up with their next meal.

Both anchovy and sardines can be purchased at your local tackle shop or quality fish market. Smelt and grunion can be caught by anglers and kept alive or fresh dead for bait. You’ll find smelt near docks, inlets and inside local harbors. They can be caught with a bait catching rig or with breadcrumbs. Grunion can only be caught by hand during a grunion run at your local beach—but be careful, as there are specific times they are not allowed to be collected.

With so many choices for bait and halibut rigging it’s almost hard to know where to start. Take a moment to ponder my tips and don’t be shy to ask a friend about their “secret” flattie techniques. It’s with information like this that you’ll be able to formulate your own style and teach the rest of us how it’s done.

So when it comes back to the question of which fish from the surf I like to eat it’ll always be the halibut. Once in a while I’ll take one in the 24”-30” range and have a delicious meal. The rest I’ll set free to, eat, grow and bite another day. So take some of the tips from what you’ve read today and add your own ideas—That way you’ll be guaranteed to discover the best technique to catch halibut at your favorite beach.

Bill Varney’s passion for surf fishing is detailed in his how-to book: Surf Fishing, The Light-Line Revolution available at most tackle shops and on line @ www.fishthesurf.com –where you’ll also find surf fishing reports, rigging tips, beach condition web cams, tides, moon phases, tackle tips and more…
Staph Infections and Surf Fishing


Staph Infection Emerging–A Serious Surfer Ailment

1-6-2007
by Corky Carroll

This article is important for anyone who will come in contact with the ocean

Last week I presented some information on an ear problem that many surfers have commonly called “surfer’s ear”–something that has come into my life many times.

Less frequently takes surgery to take care of this problem, and I have had it done five times. The doctor who finally got mine under control is Dr. Carol Jackson of Newport Beach.

I asked her to write about it for my column, and last week she shared her thoughts on this problem. This week I am continuing with what she wrote for me, this time about staph infections that are turning up more and more among surfers everywhere, but especially those here in the Orange County area.

Here is what she has to say:
“A new development in the past year has been the rise in certain potentially serious staph…MRSA, for methicillin-resistant Staphylococcus aureus, is on the rise in the community, and possibly in the Southern California surf, especially off Huntington Beach. When recognized and treated early, it’s not serious.

“The problem is that it is resistant to most antibiotics, with a couple of oral (pill) exceptions. It can require IV treatment by potentially toxic antibiotics including vancoymycin and some other newer, more experimental drugs. It can spread to other organ systems and lead to septic (infections) shock, stroke and loss of cardiac, kidney and other functions.

“Perhaps you’re familiar with the case of Timmy Turner, which was in Surfer magazine. His story and some video of him are on the Web. He was treated at Hoag. It’s still unclear, and there’s little firm data on it, but it looks like soft tissue wounds and fresh tattoos in ocean waters can be a source of entry for getting the infection.

“There’s a scientist at UCI who has been gathering data, and I know two other surfers with it–one after exostoses removal. Unfortunately the waters are monitored for fecal contaminants (coliforms) but not tested for staph.

“There’ is a carrier state in which a person has the staph in their nasal and or sinus passages, which can flare up. So, now before surgery I take a nasal swab for culture and sensitivity studies.

“If it’s positive, it’s straight forward to get rid of with Bactroban cream applied inside the nose for 10 days, and or by 10 days of oral antibiotics to which the culture shows sensitivity.

“My own thought is that some surfers have acquired it, and due to good general health either don’t have much or…are carriers with no symptoms.

“A word of caution to Southern California surfers: Don’t ignore severe headaches even if they clear up. and fevers even if they’re under 100degrees F, nausea, loss of energy or drainage from the nose and ear that has a foul odor, or color such as yellow, brown or green.

“Get checked by nasal culture and CAT scans. For soft tissue lesions that enlarge become red and sore like boils, it could be MRSA. Get them checked and cultured. Play it safe and stay out of the surf if you have any sores, cuts, lesions, fresh tattoos or recent surgical incisions.

Wow, that scares me. Especially after what happened to Timmy Turner. Timmy is one of our best young surfers here in Orange County, and he almost died form this very kind of thing.

It was touch and go for a long time, and it had everybody who knows him saying prayers and holding their breath.

This is not something to take lightly or joke about. It is becoming a serious concern for all of us who surf on a daily basis as well as for everyone who enters the ocean along our shores.

Don’t mess around with this. If you get any kind of symptoms, get help as fast as possible.

Corky Carroll is a three-time international and five time U.S. surfing champion. You can find his articles in the Orange County Register and on line at www.corkycarroll.com

Surf Fishing Bolsa Chica State Beach


ROAD TRIP
Evenings at the Beach Surf Fishing Bolsa Chica State Beach
By Bill Varney, Jr.

It’s a warm spring evening and I can feel a surf fish pulling at my line as I look back to see if the boys have started the fire yet. Today we decided to leave work a bit early and head down to the beach for a picnic and some long overdue surf fishing. As the sun begins to set I pull in my last fish and head on back to the campfire to enjoy my family and a plate of warm food.It’s evenings like this that make California’s beaches such an unmistakable treasure. Southern California has got to be one of the only places on earth were you can leave millions of city dwellers behind and head on down to the beach for an evening picnic, surf fishing and a much needed break from the rat race.

Spring, summer and fall evenings are a great time to push the city aside and head on down to the beach. Local recreation areas like Bolsa Chica State Beach offer some of the best surf fishing and picnicking along the California coast. It’s here in the evenings, just after the beachgoers begin to leave, that we find a fire ring and set up camp to do a bit of surf fishing.

FTC_BOLSA_4_op_800x600

Bolsa Chica State Beach is located between Warner Ave. and Golden West Street along Pacific Coast Highwayin Huntington Beach. With more than five miles of beach and over 200 fire pits it’s a great place to spend time with your family and have a chance at some of the best surf fishing on the coast.

The park opens at 6am and closes at 10pm. It’s facilities include fresh water showers, bathrooms, fire pits, overnight camping for self contained vehicles, park benches and miles of sandy beach great for fishing, surfing and relaxing.

Today we loaded up the car just after work and headed on down. Once we had set up camp around one of the fire pits, we headed down to the water’s edge to catch some bait.

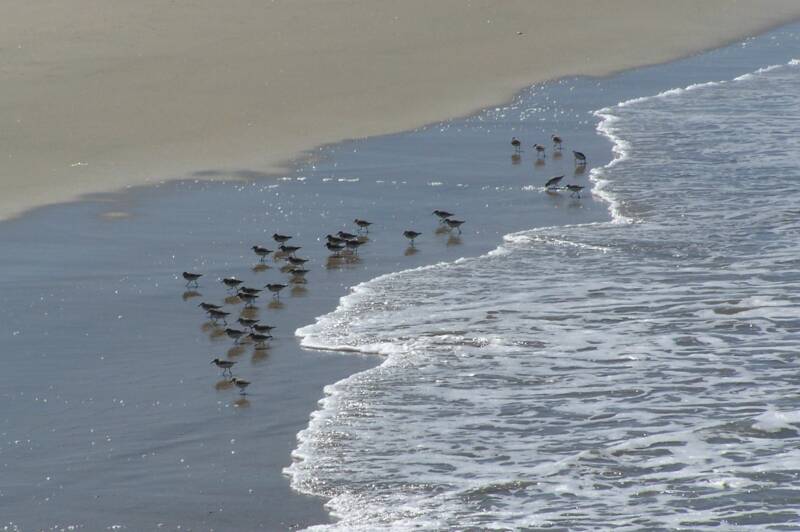
Sand crabs are the preferred meal for surf fish this time of year and Bolsa Chica is loaded with beds of crabs just waiting to be caught. Our first stop is on a berm at the sand’s edge. From here we can look down the beach for signs of sand crabs. Just to our right is a group of sand pipers punching their beaks into the sand in search of crabs. This is a good place to start.

FTC_BOLSA_5_op_800x532

FTC_BOLSA_6_op_800x600

Once we get a bit closer we see a crab bed next to the birds where sand crabs have their feeding antenna fully extended in hopes of catching their evening meal. I prefer to use a sand rake to catch crabs but the kids do just as well using their hands to dig up crabs and place them in the bucket. To keep the crabs fresh we keep them in a plastic bait bucket with a small piece of moist kelp on top.

In no time we have all the crabs we need and it’s time to try some fishing. Long gone are the days of fifteen-foot rods and thirty pound test. Today, we use light gear with rods built more for trout than tuna. My rod is eight feet long and rated four through twelve-pound test. My reel is filled with two hundred yards of four-pound test monofilament.

FTC_BOLSA_7_op_800x600

After years of surf fishing we’ve learned that most of the fish are within sixty feet of shore. We’ve also learned that if we downsize our equipment not only will we catch more fish but also we’ll have a lot more fun doing it!

Our rigging comes next. The Carolina Rig is the most commonly used setup for the beach. It’s simple and consists of a sinker, bead, swivel, an eighteen to thirty-six inch leader and a hook.

Because you want to keep in constant contact with the bottom, use a heavier sinker (¾ – 1 oz) and a shorter leader if surf is big. In small surf a longer leader and a lighter (1/4-1/2 oz) slider egg sinker works well.

Baits I like to use in the evening include: sand crabs, mussel, ghost shrimp and lugworms. If you don’t have time to collect your own bait, stop by Big Fish Tackle (562-431-0723) just a few minutes Northwest in Seal Beach (about 3 miles North on Pacific Coast Hwy. At Seal Beach Blvd.) for a great selection of live surf baits. They’ll even show you how to properly hook and fish their baits before you go!

Now that we’ve gathered our bait it’s time to find the fish. I like to find a high spot on the beach and look up and down the coast for signs of fish. The first thing I look for is the formation of small points and bays. This shows me where an offshore trough makes the water deep and a sand bar makes it shallow.

FTC_BOLSA_8_op_800x603

Straight out from the beach two troughs form where waves crash at both high and low tide. The first trough is just offshore—and many times you’ll see swimmers and surfers disappear into it as they walk out into the surf.

The second trough is where the outside waves break before they reshape and come to shore. Fish love to wait in both of these troughs for protection and feeding. It’s easiest to find these troughs at low tide. If it’s high tide when you go, try fan casting (casting to the left, center and right) during high tide to find the fish.

Another place to find surf fish is along the sides of a rip tide. Rip tides form when water that washes ashore as waves is channeled and pushed back offshore. Riptides are characterized by off-color, swirling and bubbling water. Some riptides are as little as fifteen-feet long and may last just a few minutes; others can be hundreds of yards long and extend well outside the surf line. Look for them to form off and on during your stay at the beach and cast along their edges to find fish.

FTC_BOLSA_9_op_800x600

A unique feature of Bolsa Chica State Beach is that it allows anglers to try their luck from both the beach and rock jetties. Two small jetties on the south end of the State Park produce some great fishing for perch, spotfin croaker, halibut and corbina. No matter which end of this five-mile stretch you try you’re bound to find fish.

So when you’re tired of city life and ready to head on down to the cool serenity of the beach consider any one of Southern California’s great State Beaches. They’re a great place to spend some time with your family, enjoy a bonfire picnic and try your luck at catching fish in the surf.